solution Contentsolution Content

HP OfficeJet 6900 Printers - Replacing Ink Cartridges

This document is for HP OfficeJet 6950, 6951, 6954, 6956, 6958, 6962, OfficeJet Pro 6960, 6968, 6970, 6974, 6975, 6978 All-in-One printers.
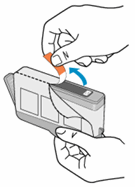
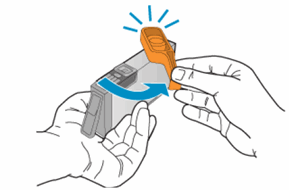
Replace ink cartridges that are low or empty with new, genuine HP ink cartridges.
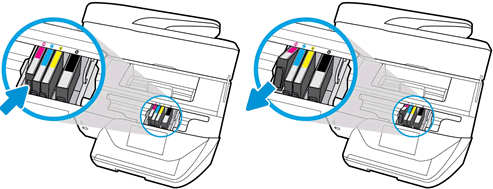
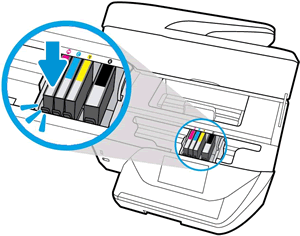
Replacing an Ink Cartridge in HP OfficeJet Pro 6900 Printers
Learn how to replace an ink cartridge in HP OfficeJet Pro 6900 printers.

Replace the ink cartridges

Replace the ink cartridges if they are low or empty.
  1. Open the ink cartridge access door.
    The carriage moves to the ink cartridge access area.
    note:
    If the scanner lid is open, the ink cartridge access door does not open.
    Opening the cartridge access door
  2. Wait until the carriage stops moving before you continue.
  3. Press the tab inward on the front of the old ink cartridge to release it, and then pull up on the ink cartridge to remove it from the slot.
    Pushing the ink cartridge inward and then pulling up to remove it
  4. Remove a new ink cartridge from its package, and then pull the orange pull-tab straight back.
      caution:
    Make sure you remove the orange pull-tab and plastic wrap completely before you remove the orange cap in the next step. Otherwise, ink might leak from the ink cartridge. When you remove the plastic wrap, the paper label on the top of the ink cartridge tears slightly, which is necessary to properly vent the ink cartridge.
    Pulling the orange tab straight back
  5. Hold the ink cartridge by its sides, and then twist the protective orange cap counter-clockwise to snap it off the ink cartridge.
      caution:
    Do not touch the copper-colored contacts or the ink nozzles. Touching these parts can result in clogs, ink failure, and bad electrical connections.
    Twisting the orange cap to snap it off the ink cartridge
  6. Gently bend the tab away from the ink cartridge.
      caution:
    Be careful not to bend the tab out more than 1.27 cm (0.5 in). Moving the tab too far might damage the ink cartridge or cause the tab to break.
       Bending the tab away from the ink cartridge
    1. Bend the tab away from the ink cartridge
    2. Do not bend the tab more than 1.27 cm (0.5 in)
  7. Turn the ink cartridge so that the ink cartridge contacts face downward, and then match the label color with the color dot on the carriage.
  8. Slide the ink cartridge into its slot, and then gently press the ink cartridge down until it snaps into place.
    Reinserting the ink cartridge
  9. Repeat these steps to install any new ink cartridges.
  10. Close the ink cartridge access door.
    Closing the ink cartridge access door

Frequently asked questions (FAQs)

Review the list of frequently asked questions about replacing the ink cartridges.