The HP Support Assistant (HPSA) application reports battery calibration needed. HP battery checks reports
calibrate (20) error. After battery calibration is run, HPSA still reports battery calibration is needed.
SUPPORT COMMUNICATION- CUSTOMER ADVISORY
Document ID: c06984171
Version: 1
HP ENVY 13, 15 x360 Convertible Laptop PCs - HP Support Assistant Reports Battery Calibration Is Needed, Battery Checks Reports Calibrate (20) Error
Notice: The information in this document, including products and software versions, is current as of the release date.The document is subject to change without notice.
Release date : 15-Dec-2020
Last updated : 15-Dec-2020
The information in this document applies to the following:
Computers:
- HP ENVY 13-ay0000 x360 Convertible Laptop PC series
- HP ENVY 13-bd0000 x360 Convertible Laptop PC series
- HP ENVY 13m-ay0000 x360 Convertible Laptop PC series
- HP ENVY 13m-bd0000 x360 Convertible Laptop PC series
- HP ENVY 15-ed0000 x360 Convertible Laptop PC series
- HP ENVY 15-ed1000 x360 Convertible Laptop PC series
- HP ENVY 15-ee0000 x360 Convertible Laptop PC series
- HP ENVY 15m-ed0000 x360 Convertible Laptop PC series
- HP ENVY 15m-ed1000 x360 Convertible Laptop PC series
- HP ENVY 15m-ee0000 x360 Convertible Laptop PC series
Operating Systems:
Non-OS Specific
The computer battery is designed to calibrate on its own over time with normal usage, and will provide a more accurate reading as the computer completes multiple charge and discharge cycles. The steps outlined below will accelerate this process and allow the computer to provide a more accurate reading of the battery’s charge capacity.
You can manually calibrate the battery on your HP computer by completing a full charge and discharge cycle. To complete the charge and discharge cycle, you must perform the following steps:
note:The purpose is to drain or discharge the battery, not get the results of the test. The battery will discharge and the computer will power off before the test results can be displayed.
- Charge the computer to a full 100 percent.
- Unplug the AC power from the computer.
- Click Start, select the Power icon and click Shut down.
- Power on the computer and immediately press the F2 key repeatedly, about once every second until the HP PC Hardware Diagnostics UEFI menu displays.
-
Select
Component Tests in the main menu.
Figure 1. Select Component Tests.

-
In the list of Components Tests, select
Memory.
Figure 2. Select Memory.

-
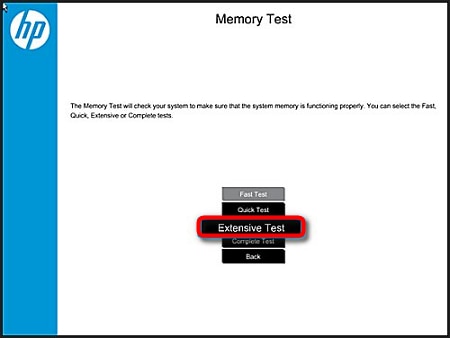
Select
Extensive Test.
Figure 3. Select Extensive Test.
- Select Loop until error to start the test. Allow the test continue until the battery is completely discharged and the computer shuts down completely.
- Allow the unit to rest for 5.5 hours.
- After the battery is fully discharged, recharge the battery to full capacity.
- Allow the unit to rest for 2 hours.
note:This test only discharges the battery and does not impact the memory.
For more information on battery calibration, refer to the following support document,
HP Notebook PCs - Testing and Calibrating the Battery (Windows).
Hardware platforms affected :
HP ENVY 13-ay0000 x360 Convertible Laptop PC series, HP ENVY 13m-ay0000 x360 Convertible Laptop PC series, HP ENVY 15-ed0000 x360 Convertible Laptop PC series, HP ENVY 15-ee0000 x360 Convertible Laptop PC series, HP ENVY 15m-ed0000 x360 Convertible Laptop PC series, HP ENVY x360 15.6 inch 2-in-1 Laptop PC 15-ee1000, HP ENVY x360 Convertible Laptop PC 13-bd0000, HP ENVY x360 Convertible Laptop PC 13m-bd0000, HP ENVY x360 Convertible Laptop PC 15-ed1000, HP ENVY x360 Convertible Laptop PC 15m-ed1000, HP ENVY x360 Laptop - 15m-ee0013dx, HP ENVY x360 Laptop - 15m-ee0023dx
Operating systems affected : Not applicable
Software affected : Not applicable
Support Communication Cross Reference ID : IA06984171
© Copyright 2023 HP Development Company, L.P.
HP Inc. shall not be liable for technical or editorial errors or omissions contained herein. The information provided is provided "as is" without warranty of any kind. To the extent permitted by law, neither HP or its affiliates, subcontractors or suppliers will be liable for incidental, special or consequential damages including downtime cost; lost profits; damages relating to the procurement of substitute products or services; or damages for loss of data, or software restoration. The information in this document is subject to change without notice. HP Inc. and the names of HP products referenced herein are trademarks of HP Inc. in the United States and other countries. Other product and company names mentioned herein may be trademarks of their respective owners.
Enter a topic to search our knowledge library
What can we help you with?

Need Help?