solution Contentsolution Content

HP ENVY 6200, 7100 Printers - 'Out of Paper' Displays, Printer Does Not Pick Up Paper

This document is for HP ENVY Photo 6220, 6230, 6232, 6234, 6252, 6255, 7120, 7130, 7134, 7155, 7158, and 7164 All-in-One printers.
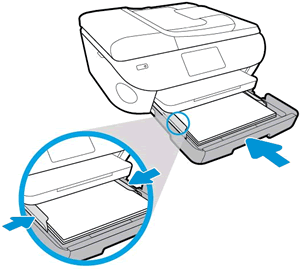
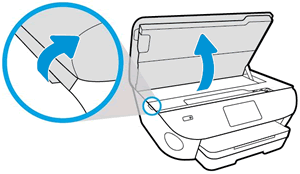
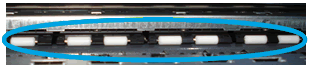
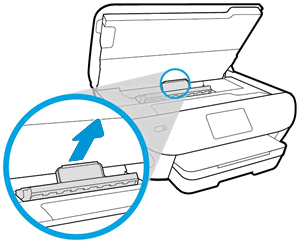
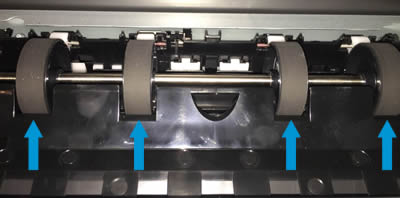
During a print or copy job, the printer does not feed paper from the paper tray. The printer might make noises as though it is printing, but no paper moves through it. A Load Paper in Tray message displays on the printer or an Out of Paper message displays on the computer.

Step 1: Check the paper, and then reload it

Review paper type and handling guidelines, and then check and reload paper in the input tray.
  1. Review these guidelines on paper quality, condition, and handling to prevent paper feed issues.
    • Use only good quality paper that meets printer specifications.
    • Store all paper in a dry, cool place. Paper feed issues occur more often in humid environments.
    • Do not print on paper that is already printed. The dampness of the ink can cause the paper to stick together.
    • Wait for the printer to complete a job or to display a Load Paper in Tray message before loading more paper.
  2. Remove any paper from the paper tray.
  3. Remove any severely bent, wrinkled, or torn paper found in the stack.
  4. Check for obstructions inside the paper tray. Make sure nothing blocks the paper from engaging with the rollers. Even small pieces of paper can cause paper feed issues.
  5. Hold the stack of paper with both hands, and then tap the bottom edge of the stack on a flat surface so that the stack is even on all sides.
  6. Load the stack of paper into the paper tray until the paper stops, and then gently slide in the paper width guides until they lightly rest against the edges of the paper.
    Loading paper in the paper tray
  7. Push the paper tray in until it snaps into place.
  8. Select or confirm the paper size you loaded on the control panel display.
Try to print. If the issue persists, continue to the next step.

Step 2: Clean the paper tray rollers

Clean dust and fibers from the paper tray rollers underneath the printer.
  1. Carefully lift the printer and set it on its side.
  2. While supporting the printer with one hand, pull the paper tray open to expose the paper rollers underneath the printer.
    Rollers underneath the printer
  3. Lightly dampen a lint-free cloth with distilled water, and then squeeze any excess liquid from the cloth.
  4. Press the cloth against the rollers inside the printer, and then rotate the rollers upwards with your fingers. Apply a moderate amount of pressure to remove any dust or dirt buildup.
  5. Allow the rollers to dry completely (approximately 10 minutes).
  6. Close the paper tray, and then set the printer upright.
Try to print. If the error persists, continue to the next step.

Step 3: Clean the paper feed rollers

Clean dust and fibers from the paper feed rollers inside the ink cartridge access area.
  1. Turn off the printer, and then disconnect the power cord.
      warning:
    To avoid risk of injuries or electric shock, disconnect the power cord before reaching inside the printer.
  2. Open the ink cartridge access door.
    Opening the ink cartridge access door
  3. Lightly dampen a lint-free cloth with distilled water, and then squeeze any excess liquid from the cloth.
  4. Press the cloth against the rollers inside the printer, and then rotate the rollers upwards with your fingers. Apply a moderate amount of pressure to remove any dust or dirt buildup.
    Rollers in the cartridge access area
  5. Allow the rollers to dry completely (approximately 10 minutes).
  6. Close the ink cartridge access door.
  7. Reconnect the power cord to the rear of the printer, and then turn on the printer.
Try to print. If the error persists, continue to the next step.

Step 4: Clean the duplexing rollers

Clean dust and fibers from the duplexing rollers behind the ink access area.
  1. Turn off the printer, and then disconnect the power cord.
      warning:
    To avoid risk of injuries or electric shock, disconnect the power cord before reaching inside the printer.
  2. Open the ink cartridge access door.
    Opening the ink cartridge access door
  3. Pull out the paper path cover.
    Removing the paper path cover
  4. Lightly dampen a lint-free cloth with distilled water, and then squeeze any excess liquid from the cloth.
  5. Press the cloth against the rollers, and then rotate them upward with your fingers. Apply a moderate amount of pressure to remove any dust or dirt buildup.
    Cleaning the paper path cover rollers.
  6. Allow the rollers to dry completely (approximately 10 minutes).
  7. Insert the paper path cover back into the printer.
  8. Close the ink cartridge access door.
  9. Reconnect the power cord to the rear of the printer, and then turn on the printer.
Try to print. If the error persists, continue to the next step.

Step 5: Reset the printer

Sometimes an error persists even though there is no paper feed issue. Reset the printer, and then try to print.
  1. With the printer turned on, disconnect the power cord from the printer.
  2. Unplug the power cord from the power source.
  3. Wait 60 seconds.
  4. Reconnect the power cord to a wall outlet and to the printer.
    note:
    HP recommends plugging the printer directly into a wall outlet.
Try to print. If the error persists, continue to the next step.

Step 6: Service the printer

Service or replace your HP product if the issue persists after completing all the preceding steps.
Go to Contact HP Customer Support to schedule a product repair or replacement. If you are in Asia Pacific, you will be directed to a local service center in your area.
To confirm your warranty status, go to HP Product Warranty Check. Repair fees might apply for out-of-warranty products.