When a jam occurs, the control panel displays a message and an animation that assists in clearing the jam.
-
13.A1.FF error
-
13.A1.A1 error
-
13.A1.D1 error
note:If the residual jam occurs at power on, the jam code will not display on the control panel; instead it will be listed in the printer's event log.
The information provided in this document applies to the following printer models:
-
HP LaserJet Enterprise M607
-
HP LaserJet Enterprise M608
-
HP LaserJet Enterprise M609
-
HP LaserJet Enterprise M610
-
HP LaserJet Enterprise M611
-
HP LaserJet Enterprise M612
-
HP LaserJet Managed E60055
-
HP LaserJet Managed E60067
-
HP LaserJet Managed E60075
-
HP LaserJet Managed E60155
-
HP LaserJet Managed E60165
-
HP LaserJet Managed E60175
Follow the steps below in the order presented to clear the paper jam.
note:Click the step heading to expand that section and then follow the steps provided.
Step one: Clear paper jams in the output bin and in Tray 1
In addition to the instructions provided below, you can view the following video of how to clear a paper jam in Tray 1:

How to Clear Paper Jam in Tray 1 for HP LaserJet Enterprise M607-M612, Managed E600xx-E601xx Series
No audio. Learn how to clear paper jam in tray 1 for HP LaserJet Enterprise M607-M612, Managed E600xx-E601xx series.
-
Remove any loose sheets of paper from the output bin.
-
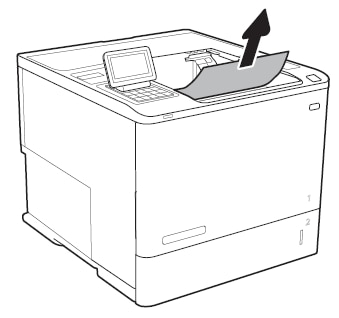
If any paper is visible in the output bin, hold theleading edge of the paper and remove it.Figure : Remove jammed paper from output bin
-
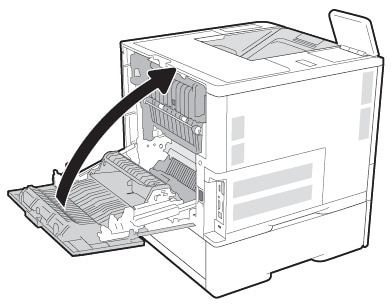
Open Tray 1.Figure : Open Tray 1

-
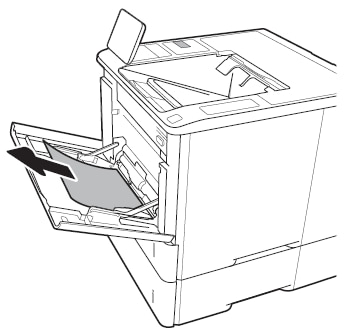
If there is any jammed paper visible in Tray 1, gently pull the paper straight out to remove it.Figure : Remove jammed paper from Tray 1
-
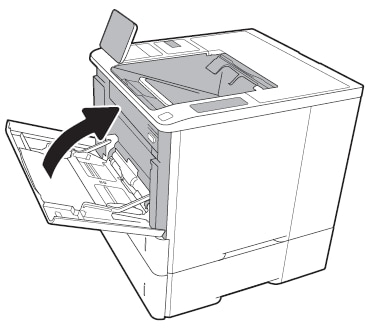
Close Tray 1.Figure : Close Tray 1
Step two: Clear the paper jam in Tray 2
-
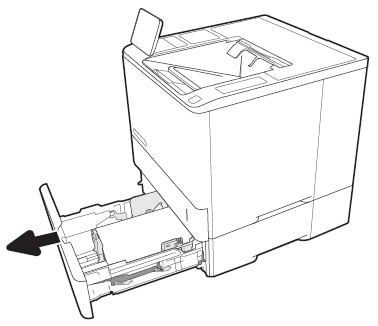
Open Tray 2 and lift it up slightly to pull the tray completely out of the printer.Figure : Remove Tray 2 from the printer
-
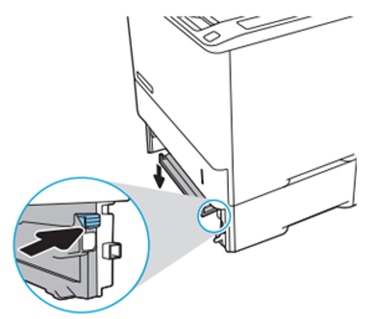
Press the jam plate release button to lower the jam clearing plate.Figure : Location of the jam plate release button
-
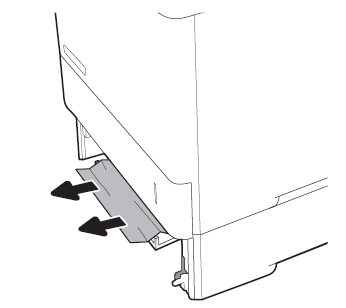
If any jammed paper or obstructions are in the paper path, gently pull the jammed paper straight out to remove it.Figure : Remove jammed paper
-
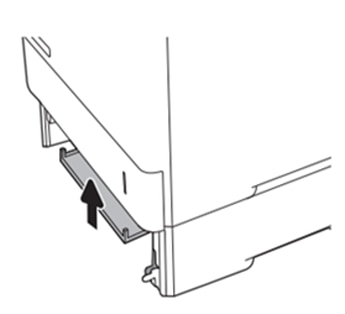
Raise the jam clearing plate back into the correct position.Figure : Lift the jam clearing plate
-
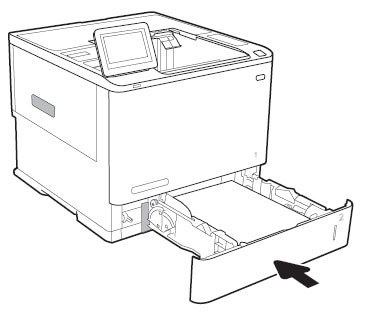
Reinsert Tray 2 in the printer and then close the tray.Figure : Reinsert and close Tray 2
Step three: Clear the paper jam in the rear door
-
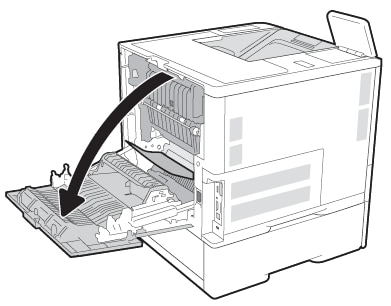
Open the rear door.Figure : Open the rear door
-
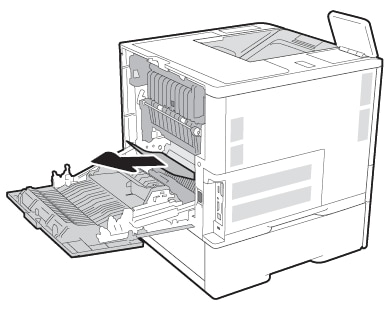
If any jammed paper is visible, gently pull the jammed paper straight out to remove it.Figure : Remove jammed paper from inside the rear door
-
Close the rear door.Figure : Close the rear door