This document provides the procedure to install the optional printer stand for the following printers:
-
HP LaserJet Enterprise M607
-
HP LaserJet Enterprise M608
-
HP LaserJet Enterprise M609
-
HP LaserJet Enterprise M610
-
HP LaserJet Enterprise M611
-
HP LaserJet Enterprise M612
-
HP LaserJet Managed E60055
-
HP LaserJet Managed E60065
-
HP LaserJet Managed E60075
-
HP LaserJet Managed E60155
-
HP LaserJet Managed E60165
-
HP LaserJet Managed E60175
-
Take the printer stand out of the box, and then remove the packaging material. Verify that the contents match this illustration:
note:
HP recommends recycling packing materials whenever possible.Figure : Contents of the box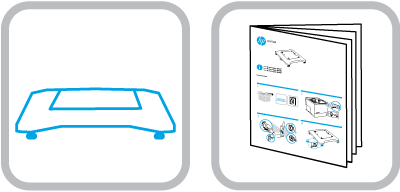
-
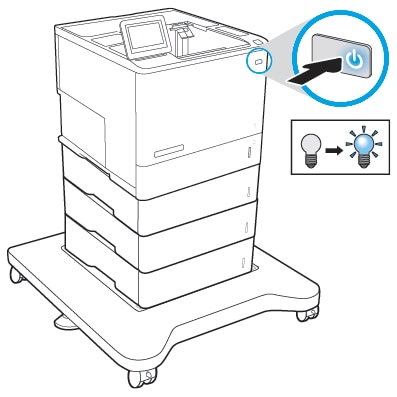
Press the Power button to turn OFF the printer.Figure : Turn off the printer

-
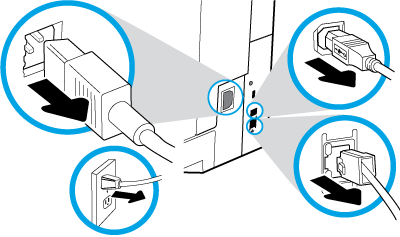
Disconnect the power cord and the USB cable or network cable.Figure : Disconnect the cables
-
Place the printer stand on the floor in the location where the printer will reside, and then engage the locks on the wheels to prevent the stand from rolling.Figure : Lock the wheels

-
Place the paper feeder accessory tray(s) on the printer stand, and then place the printer on top of the accessory tray(s). Use the alignment pins to position the trays and the printer. Close the latch on the right side of each accessory tray to lock it.
note:
HP recommends that two people move the printer to place it on top of the accessory tray(s).Figure : Place the accessory trays and printer on the stand
-
Unscrew the stabilizing feet on the bottom of the printer stand so they rest on the floor and support the printer.
note:
The stabilizing feet should place enough pressure on the floor to prevent the printer stand from rolling.Figure : Unscrew the stabilizing feet to support the printer
caution:
Do not extend more than one paper tray at a time.Do not use the printer stand or paper tray as a step.Keep hands out of trays when closing.All trays must be closed when moving the printer. -
Reconnect the power cord and the USB cable or network cable.Figure : Reconnect the cables

-
Press the Power button to turn on the printer.Figure : Turn on the printer