This document applies to the HP LaserJet Pro MFP M225 and M226 printer series.
Follow these steps to replace the toner cartridge in your printer.
note:The imaging drum is integrated into the toner cartridge. To replace the imaging drum, you must replace the toner cartridge.
This video shows how to replace the toner cartridge in the HP LaserJet Pro MFP M225dn and M226dn

Replacing the Toner Cartridge - HP LaserJet Pro MFP M225dn and M226dn
Learn how to replace the toner cartridge in the HP LaserJet Pro MFP M225dn and M226dn.
-
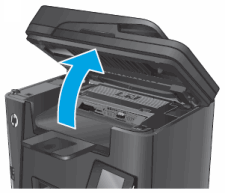
Raise the scanner assembly.Figure : Raise the scanner assembly
-
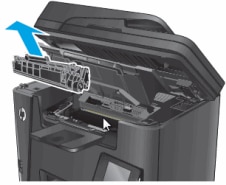
Open the top cover.Figure : Open the top cover

-
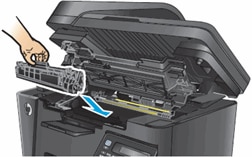
Remove the toner cartridge.Figure : Remove the toner cartridge
-
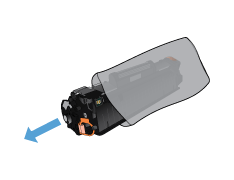
Remove the new toner cartridge from the bag. Place the used toner cartridge in the bag for recycling.Figure : Remove the new toner cartridge from the package
-
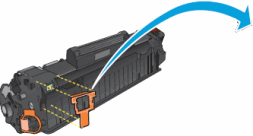
Grasp both ends of the toner cartridge, and then gently rock the cartridge back and forth to distribute the toner.
caution:
Do not touch the surface of the image drum.Figure : Gently rock the toner cartridge back and forth
-
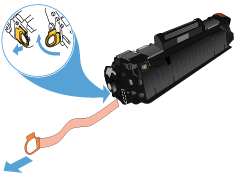
Remove the orange clip from the toner cartridge.Figure : Remove the orange clip from the toner cartridge
-
Bend the tab on the left side of the cartridge until the tab separates from the cartridge. Pull out the tab until all the sealing tape is out of the cartridge. Place the tab and tape in the toner cartridge box to return for recycling.Figure : Remove the sealing tape
-
Align the toner cartridge with the tracks inside the printer, and then slide in the toner cartridge until it is firmly seated.Figure : Insert the toner cartridge into the printer
-
Close the top cover.
-
Lower the scanner assembly.Figure : Lower the scanner assembly

