solution Contentsolution Content

HP Deskjet 1510, 2540 Printers - First Time Printer Setup

This document is for the following printers: HP Deskjet 1510, 1511, 1512, 1513, 1514, 2540, 2541, 2542, 2543, 2544, 2546, 2546B, 2546P, 2546R, 2547, 2548, and 2549; and Deskjet Ink Advantage 1515, 1516, 1518, 2545, 2546, and 2548 printers.
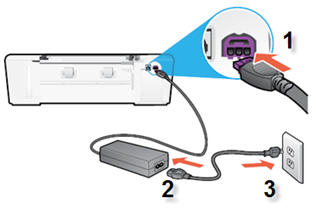
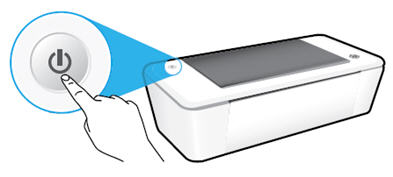
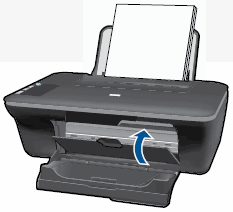
Unbox and turn on your new printer, install the ink cartridges, load the paper tray, and then install the print driver on the computer.
note:
If you are looking for the printer software, go to:

Video of setting up the printer

The following video demonstrates how to set up the physical parts of the printer.
note:
This video shows the HP Deskjet 1510 All-in-One printer, but the steps are the same for your printer.
Unboxing and Setting Up the HP Deskjet 1010 Printer
Learn how to unbox and set up the HP Deskjet 1010 printer. Items included in the box might vary by region.
If you have trouble viewing the video or to view the video in a different size, click here to play the video on YouTube.

Step 1: Check the contents of the box

The contents might vary by country/region. See the packaging for a list of items shipped in the box.

Step 2: Unpack the printer

  1. Remove the printer from the box.
  2. Remove the tape and packing material from the outside of the printer.
  3. Open the output tray, and then open the cartridge access door.
    Figure : Open the output tray and cartridge access door
    Image: Open the output tray and cartridge access door
  4. Remove the tape and cardboard from inside the printer
    Figure : Remove the packing materials from inside the printer
    Image: Remove the packing materials from inside the printer
  5. Close the cartridge access door.
    Figure : Close the cartridge access door
    Image: Close the cartridge access door
  6. Recycle the packing materials.
    Figure : Recycle the packing materials
    Image: Recycle the packing materials

Step 3: Connect the power cord, and then turn on the printer

Important: Your printer might have a protective plastic sticker that looks like an active printer control panel. Remove the sticker from the control panel before you continue with this step.
  1. Connect the cord from the adapter to the rear of the printer.
  2. Connect the power cord to the power adapter, and then plug the power cord into an electrical outlet.
      Figure : Connect the power cord
      Image: Connect the power cord
    1. Connect the cord from the adapter to the rear of the printer
    2. Connect the power cord to the adapter
    3. Plug the power cord into the electrical outlet
  3. Press the Power button to turn on the printer.
    Figure : Turn on the printer
    Image: Turn on the printer

Step 4: Load paper

  1. Raise the input tray.
    Image: Raise the input tray
  2. Lower the output tray.
    Image: Lower the output tray
  3. Pull out the tray extender.
    Image: Pull out the tray extender
  4. Load a stack of U.S. Letter or A4 paper into the input tray with the short edge forward and the printside up. Push the stack into the tray until it stops.
    Image: Load plain, white paper into the input tray
  5. Slide the paper width guide inward until it rests against the edge of the paper.
    Image: Slide the paper width guide inward

Step 5: Install the cartridges

  1. Open the cartridge access door. The carriage moves to the center of the printer. Wait until the printer is idle and silent before continuing.
    Figure : Open the cartridge access door
    Image: Open the cartridge access door
  2. Remove the new cartridge from its packaging, and then pull the orange tab to remove the plastic tape.
      caution:
    Do not touch the copper-colored contacts or the ink nozzles. Touching these parts can result in clogs, ink failure, and bad electrical connections.
    Figure : Remove the plastic tape
    Image: Remove the plastic tape and do not touch the contacts or ink nozzles
  3. Hold the cartridge by its sides with the nozzles toward the printer, and then insert the cartridge into its proper slot.
    • The tri-color cartridge (
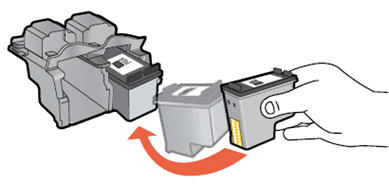
) goes in the slot on the left.
    • The black cartridge () goes in the slot on the right.
    Figure : Insert the cartridge into its slot
    Image: Insert the cartridge into its slot
  4. Push the cartridge forward into its slot until it snaps into place.
    Figure : Snap the cartridge into place
    Image: Snap the cartridge into place
  5. Repeat these steps to install the other cartridge.
  6. Close the cartridge access door.
    Figure : Close the cartridge access door
    Image: Close the cartridge access door
  7. Wait about 30 seconds for the alignment page to automatically print.
    Figure : The alignment page prints automatically after 30 seconds
    Image: The alignment page prints automatically after 30 seconds
    note:
    The printer prints an alignment page automatically only when a new cartridge has been installed.

Step 6: Align the cartridges

  1. Lift the scanner lid.
  2. Place the alignment page with the print side down on the right-front corner of the scanner glass. See the engraved guide next to the scanner glass for help loading the alignment page.
    Image: Place the alignment page on the scanner glass
  3. Close the scanner lid.
  4. Press the Start Copy Black button 
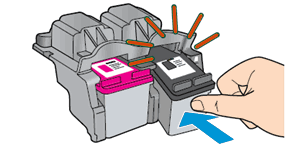
or the Start Copy Color button 
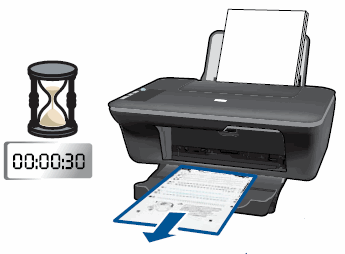
on the front panel of the printer. The printer aligns the ink cartridges.

Step 7: Install the printer software

Your HP printer hardware is now set up and you can install the printing software. Do not attempt to connect the printer to a computer until instructed to do so in the printing software.
Download the latest version of the printing software from the following HP websites: