This document explains how to set up the physical parts of the product. Complete these steps before you install the product software on your computer.
HP Officejet 4400 (K410), Deskjet Ink Advantage (K209), and Deskjet F4400 All-in-One Printer Series - Setting up the All-in-One (Hardware)
Introduction
This document includes the following steps to set up the product:
-
Unpack the All-in-One
-
Check the contents of the box
-
Connect the power cord and adapter
-
Load plain white paper
-
Install the cartridges
-
Align the cartridges
Setting up the All-in-One
Follow these steps in order.
Step one: Unpack the All-in-One
-
Lift the product out of its box.
-
Remove all tape from the paper tray, and then open the front access door.Figure : Remove tape from paper tray

-
Remove the packing material from inside the front access door.Figure : Remove packing material

-
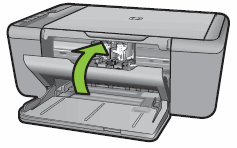
Close the front access door.Figure : Close the front access door
Step two: Check the contents of the box
The contents might vary by country/region. See the packaging for a list of items shipped in the box.
Step three: Connect the power cord and adapter
-
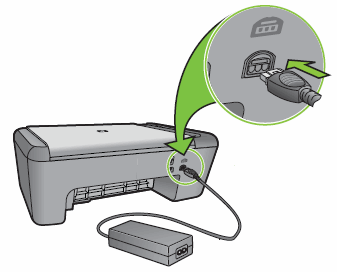
Turn the product to access its rear side.
-
Plug the power cord into the rear of the product.Figure : Connect the power cord to the rear of the product
-
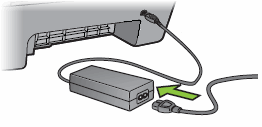
Connect the power cord to the power adapter.Figure : Connect the power cord to the power adapter
-
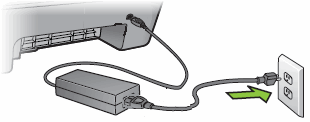
Plug the other end of the power cord into an electrical outlet.Figure : Connect the power cord to the electrical outlet
-
Press the Power button (
 ) to turn on the product.
Figure : Turn on the product
) to turn on the product.
Figure : Turn on the product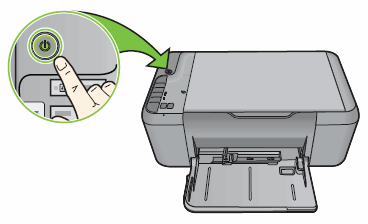
Step four: Load plain white paper
-
Pull out the paper tray extender.Figure : Pull out the paper tray extender
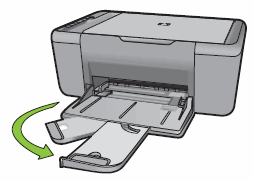
-
Pull out the paper stop at the end of the paper tray extender.Figure : Pull out the paper stop

-
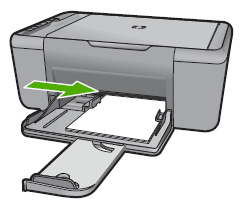
Slide the paper-width guide to its outermost position.Figure : Slide the paper-width guide to its outermost position

-
Load a stack of plain white paper into the paper tray with the short edge forward and print side down. Push the paper forward until it stops.Figure : Load paper
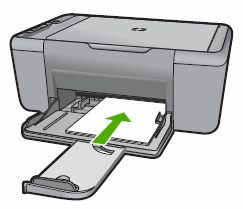
-
Adjust the paper-width guide so it rests against the stack of paper.Figure : Adjust the paper-width guide
Step five: Install the cartridges
-
Make sure the product is on.
-
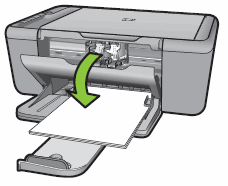
Open the front access door.Figure : Open the front access door
-
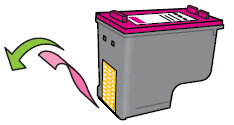
Remove one of the cartridges from its packaging, and then pull the pink pull-tab to remove the protective tape from the nozzles.Figure : Remove the protective tape
caution:
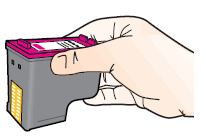
Do not touch the cartridge contacts or nozzles.Figure : Do not touch the contacts
-
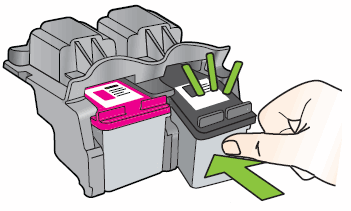
Hold the cartridge by its sides.Figure : Hold the cartridge by its sides
-
Insert the cartridge into its designated slot. The black parallelogram icon (
 ) designates the slot for the black cartridge, and the magenta half circle icon (
 ) designates the slot for the color cartridge.
Figure : Insert cartridge
) designates the slot for the color cartridge.
Figure : Insert cartridge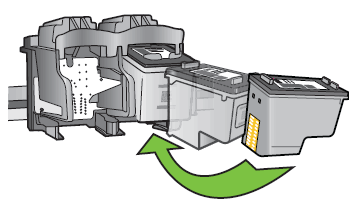 The cartridge rests in its slot at a slight upward angle.Figure : Cartridge rests at upward angle
-
Press the cartridge in to snap it into place.Figure : Snap cartridge into place
-
Repeat these steps to insert the other cartridge into its designated slot.
-
Close the front access door.Figure : Close the front access door
Step six: Align the cartridges
-
Wait while the product starts an automatic alignment process, and then prints an alignment sheet. The alignment process takes about 30 to 60 seconds to complete.Figure : Product prints an alignment sheet

note:
If the product does not automatically start the alignment process, disconnect the power cord from the rear of the product, and then plug it back in. -
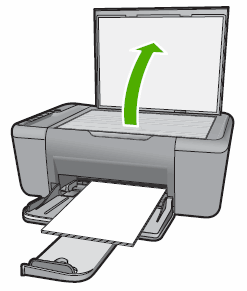
Lift the product lid.Figure : Lift the product lid
-
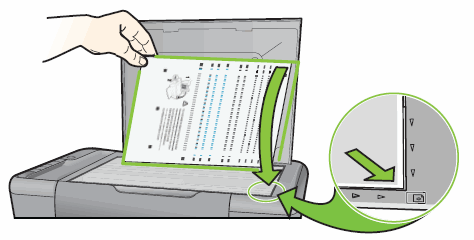
Place the alignment sheet on with the printed side down on the right-front corner of the scanner glass. See the engraved guide next to the scanner glass for help loading the alignment sheet.Figure : Load the alignment sheet
-
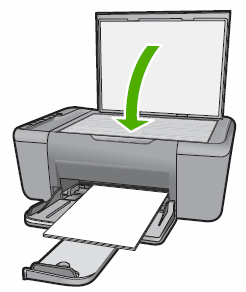
Lower the product lid.Figure : Lower the lid
-
Press the Scan button (
 ) to scan the alignment sheet.
Figure : Scan the alignment sheet
) to scan the alignment sheet.
Figure : Scan the alignment sheet
-
Wait while the product scans the alignment sheet and completes the alignment process.
Enter a topic to search our knowledge library
What can we help you with?

Need Help?