This document is for HP Color Laser MFP 178nw, 178nwg, 179fnw, and 179fwg printers.
HP Color Laser 178, 179 Printers - Replacing a TCU (Toner Collection Unit)
A toner collection unit (TCU) collects waste toner during printing. When a Replace/Install Waste
Toner Tank message displays on the printer control panel, the TCU is full and needs replacing. Avoid reusing a TCU to prevent print quality issues.
note:HP recommends having a replacement TCU available to avoid possible printing delays.
Replace a toner collection unit
Replace the TCU when a Replace/Install Waste
Toner Tank message displays.
-
Turn off the printer, and then disconnect the power cord from the wall socket or power strip.
warning:
You must disconnect the power cord before reaching inside the printer to avoid risk of injuries or electric shock. -
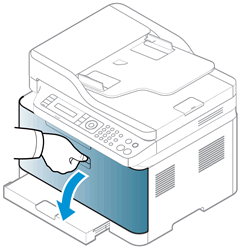
Open the toner cartridge access door.
-
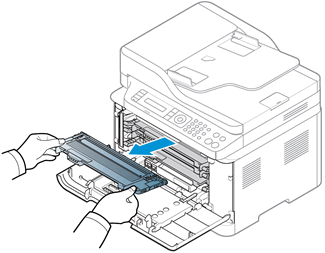
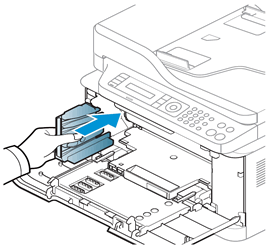
Grasp each side of a toner cartridge, and then pull out the toner cartridge to remove it. Repeat this step to remove all the toner cartridges. Set each toner cartridge aside.
-
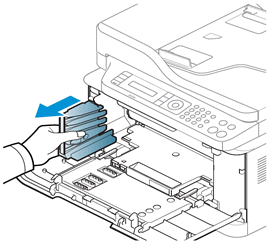
Remove the TCU. Carefully set the unit aside on a flat, solid surface to avoid spilling the waste toner.
-
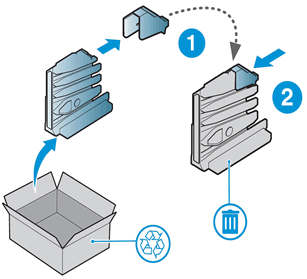
Remove the new TCU from its package. Remove the cap from the new unit, and then attach the cap to the old unit.
-
TCU cap from the new unit
-
TCU cap attached to the old unit
-
-
Recycle the packing materials, and then discard the old TCU.
-
Insert the new TCU.
-
Reinstall the toner cartridges.

-
Close the toner cartridge access door.
-
Reconnect the power cord to the wall outlet or power strip, and then turn on the printer.
With the new TCU installed, the printer is ready to print.
Enter a topic to search our knowledge library
What can we help you with?

Need Help?