solution Contentsolution Content

HP ScanJet Pro 2000 s1, 3000 s3, HP ScanJet Enterprise Flow 5000 s4, 7000 s3, N9120 fn2, HP Digital Sender Flow 8500 fn2 - Obtain advanced scan settings and features

Overview

New feature enhancements are now available for the following scanners:
  • HP ScanJet Pro 2000 s1 Sheet-feed Scanner
  • HP ScanJet Pro 3000 s3 Sheet-feed Scanner
  • HP ScanJet Enterprise Flow 5000 s4 Sheet-feed Scanner
  • HP ScanJet Enterprise Flow 7000 s3 Sheet-feed Scanner
  • HP Digital Sender Flow 8500 fn2 Document Capture Workstation
  • HP ScanJet Enterprise Flow N9120 fn2 Document Scanner
The following new feature enhancements have been added and can be used when scanning using either the HP Scan or the HP Twain application (unless otherwise noted):
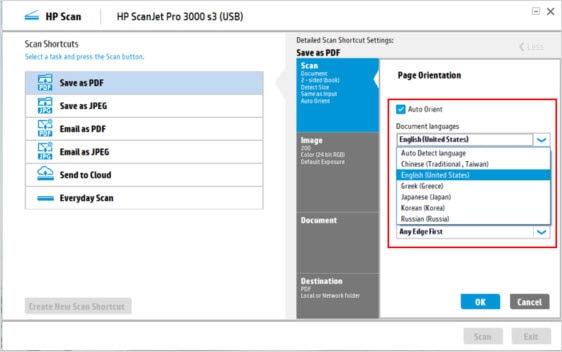
  • Auto-orientation – More languages are now available.
  • Auto-feed – Scan automatically without having to click the Scan button.
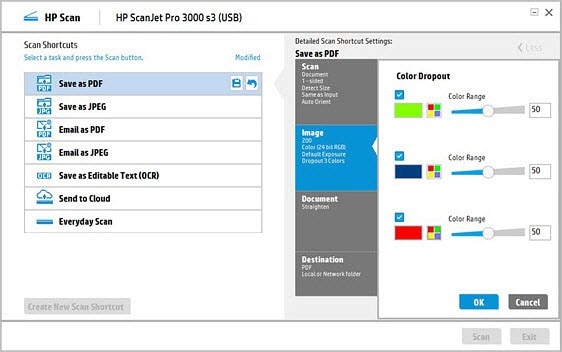
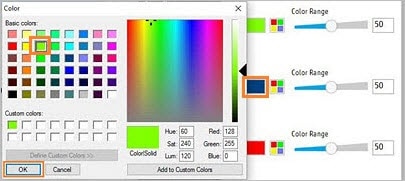
  • Color drop-out – Select the color you want to drop out with ease.
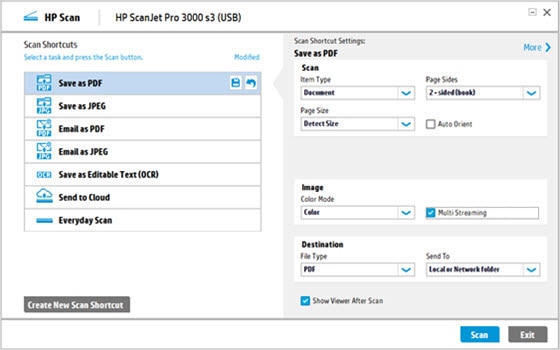
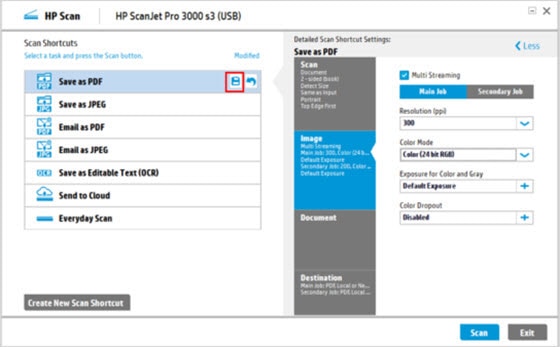
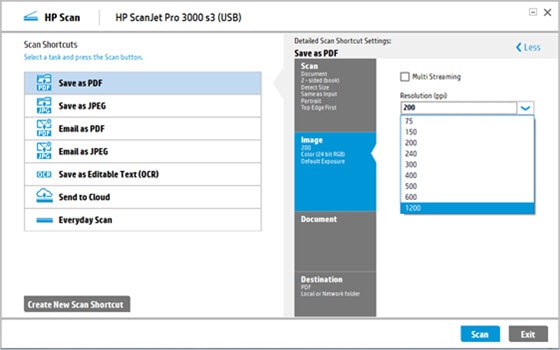
  • Multi Streaming – Obtain two scan images from different image color modes (color, gray, and white/black) with a single scan.
  • Resolution - Scan an image at 1200 ppi resolution.
    note:
    The 1200 ppi resolution is not available on HP Digital Sender Flow 8500 fn2 and HP ScanJet Enterprise Flow N9120 fn2 scanners.
  • Compression - TIFF compression options available when scanning and saving to TIFF file format.
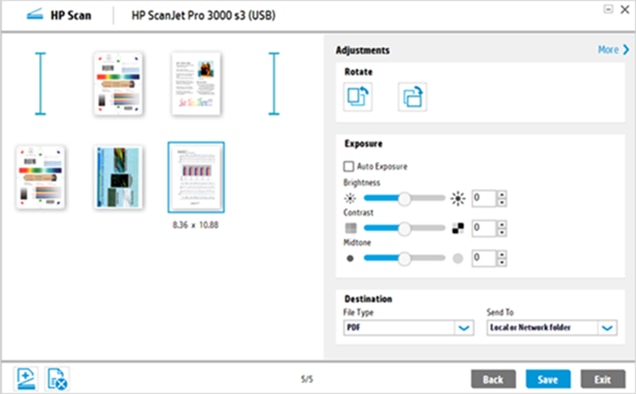
  • Page-by-page – Monitor the job progress with thumbnails that display after each page is scanned.
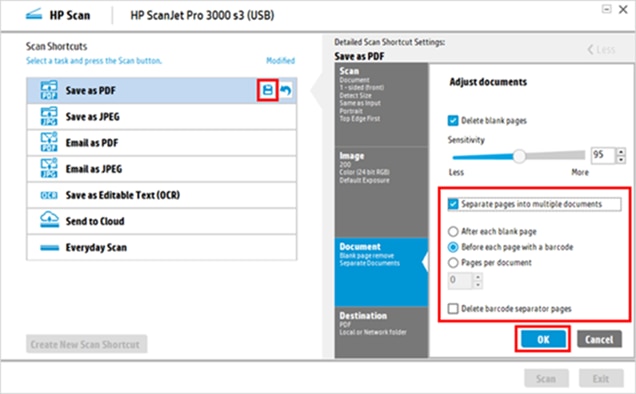
  • Separation page – Insert page separators after a blank page, or before each page, or a set number of pages with a barcode to save multiple scanned documents as separate files.
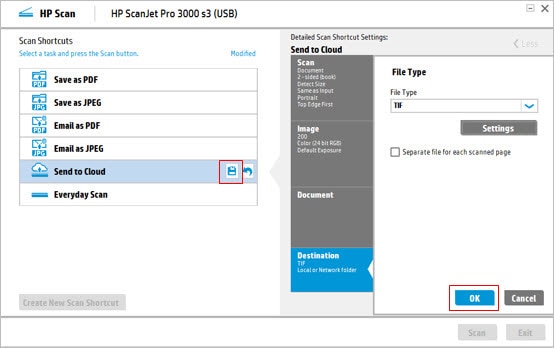
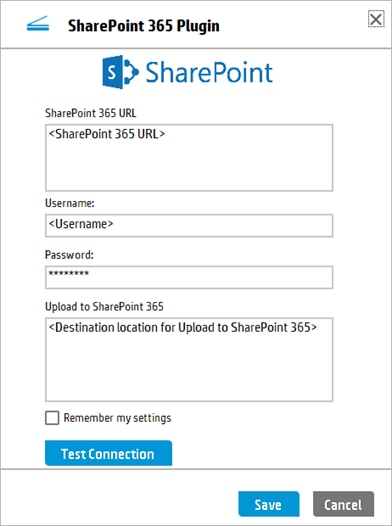
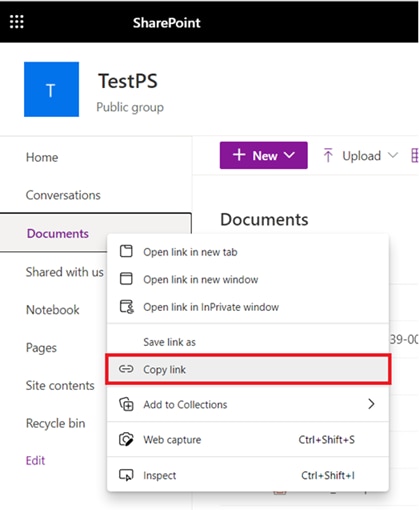
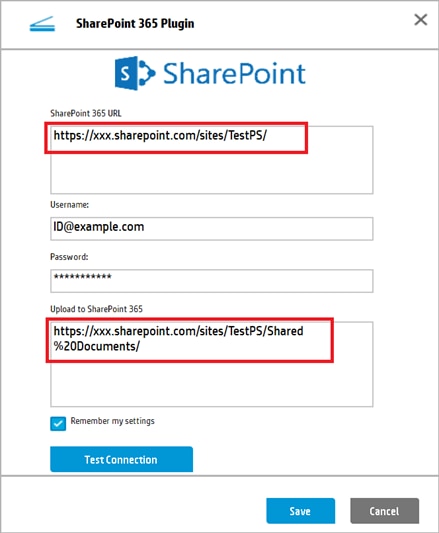
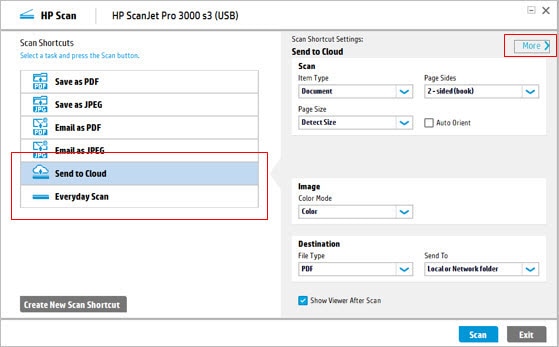
  • Destination – Send scanned images to a destination (SFTP or Office 365, for example).
  • Performance – Thumbnail images display quickly on HP Scan when scanning multiple pages, reducing the scan image file size and time when saving scanned images.
  • Page Sides - Scan either the front or back side of a page.
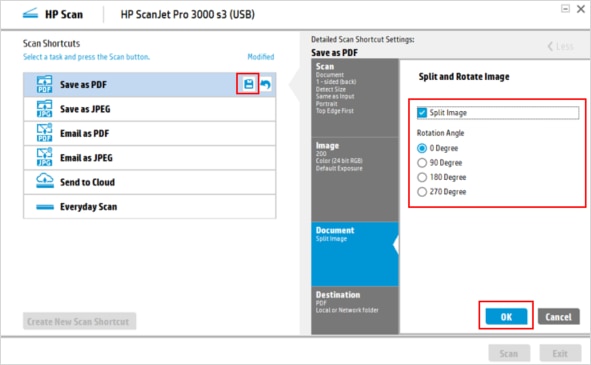
  • Split and rotate - Split a scan image evenly into half and rotate each half by selecting the preferred angles.
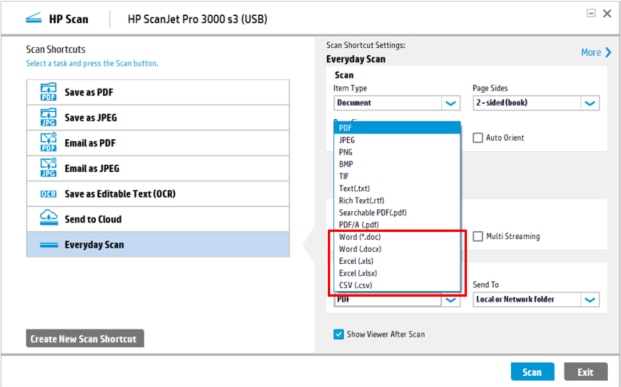
  • File type or format - Scan and save a file in either Excel or Word formats.
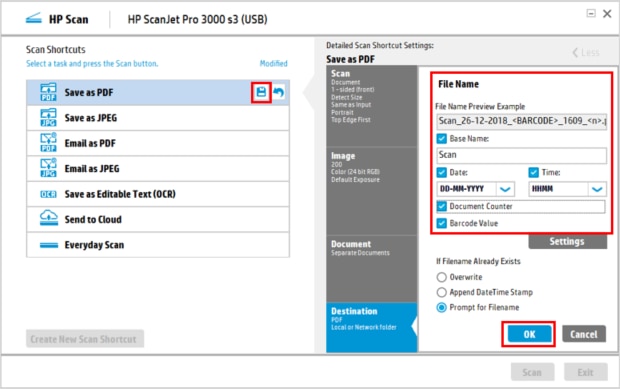
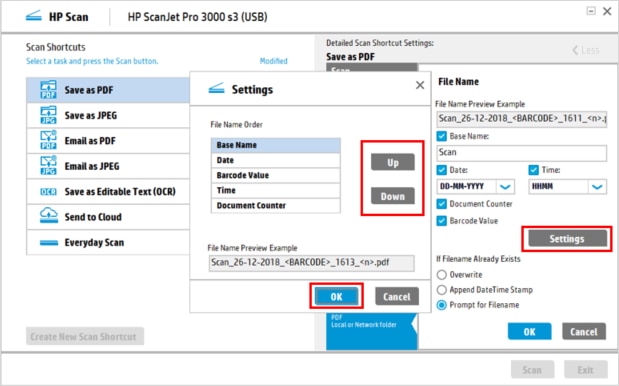
  • File name options - Use options such as Barcode Value, date, time, and document counter to be included in a file name and reorder these file name options, if desired.
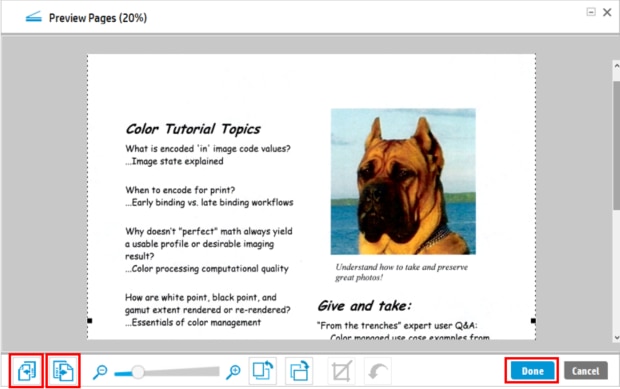
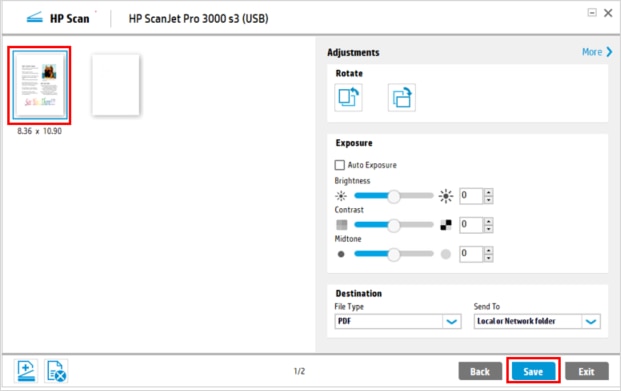
  • Edit an image in Preview pane - Use the zoom, rotate, or crop icons to view and edit scanned images.
To obtain these enhancements, download the latest full software solution, and then follow the steps to adjust the settings.

Step one: Download the latest software

  1. Go to HP Support.
  2. Search for the ScanJet model number (HP ScanJet 3000 s3, for example).
  3. On the left tabs, select Software and Drivers.
  4. Select or change the operating system if it is not automatically detected.
  5. Depending on your scanner, follow the steps to install the software.
    For HP ScanJet Pro 2000 s1, 3000 s3, HP ScanJet Enterprise Flow 5000 s4, 7000 s3:
    1. Expand the Driver-Product Installation Software section.
    2. Make sure to download the full software driver solution (HP ScanJet Pro 3000 s3 Full Feature Software and Driver, for example).
    3. Follow any on-screen instructions to download and install the software.
    For HP ScanJet Enterprise Flow N9120 fn2 and HP Digital Sender Flow 8500 fn2:
    1. Expand the Driver-Product Installation Software section, and then expand Basic Drivers section.
    2. Make sure to download the HP Scan and Twain Package for USB.
    3. Expand the Update section, and then expand the Basic Drivers section.
    4. Download Scan to OCR Plug-in (HP Scan).
    5. Follow any on-screen instructions to download and install the software.
No.
Plug-in
1
Evernote Destination Plug-in
2
Box Evernote Plug-in
3
Box Plug-in
4
Scan to Office 365 Plug-in Software
5
Scan to OCR Plug-in (HP Scan)
6
Scan to SMTP Plug-in Software
7
Scan to Sharepoint Plug-in Software
* The plugins, Scan to OCR, Scan to SMTP and Scan to SharePoint are included in Full Feature Scan Software and Driver (Full web packs). Also, it is not available in basic webpack.

Step two: Adjust the settings

Depending on the settings you want to adjust, perform any of the following tasks:

Step three: Send scanned images to a destination

note:
Make sure that your computer is connected to the network and the scanner has USB capabilities to send a scanned image to a destination.
Applicable scanners to send scanned images to a destination are the following:
  • HP ScanJet Pro 2000 s1 Sheet-feed Scanner
  • HP ScanJet Pro 3000 s3 Sheet-feed Scanner
note:
Make sure to save your settings before sending the scanned image to a destination.
  1. Download and install a Plug-in driver: Scan to Office 365 Plug-in Software or sFTP Destination Plug-in.
    1. Go to HP Support.
    2. Search for the ScanJet model number (HP ScanJet 3000 s3, for example).
    3. Select or change the operating system if it is not automatically detected.
    4. Under Update, expand Basic Drivers, select either Scan to Office 365 Plug-in Software or sFTP Destination Plug-in, and then click Download.
    5. Follow any of the on-screen instructions to download and install the plug-in with admin privilege.
  2. Open HP Scan.
  3. Select either Send to Cloud or Everyday Scan.
  4. Select Destination, and then under Send To, select a scan destination (SFTP, for example).
  5. Click Configure to configure the scan destination, and then click Scan.
    Click Save to save the settings.
    Figure : Destination settings Scan to Office 365
    Destination settings Scan to Office 365
    Figure : Configure Scan to Office 365
    Configure Scan to Office 365
For getting proper URL for SharePoint 365 URL and Upload to SharePoint 365;
  1. Login to SharePoint365 account from the browser.
  2. Right-click the Documents and select the copy link as shown below.
    Figure : Select the copy link
    Select the copy link
  3. The Copy link will be similar to “https://xxx.sharepoint.com/sites/TestPS/Shared%20Documents/Forms/AllItems.aspx”.
    From the Copy link, trim the URL before “Shared%20Documents” and give it as SharePoint365 URL (https://xxx.sharepoint.com/sites/TestPS/).
  4. The Upload to SharePoint 365 URL should be given as https://xxx.sharepoint.com/sites/TestPS/Shared%20Documents/<FolderName>(If required).
If required select the option “Remember my settings” to avoid filling the same fields with the same data.
Figure : Example of Configure Scan to Office 365
Example of Configure Scan to Office 365
Click on the Test Connection button to validate the entries filled. Please note that even though "Test Connection" requires a non-empty "Upload to SharePoint 365 URL", the test does not evaluate the destination
Figure : Test Connection verification
Test Connection verification
After scanning is completed, click on the Upload button to send the scanned files to SharePoint 365 destination.
Figure : Image uploading
Image uploading
An upload success message will pop up if the server is available and the upload is succeeded.
Figure : Image uploaded successfully
Image uploaded successfully
If upload to SharePoint 365 is failed, an error message will be displayed as shown below.
Figure : Image upload failure
Image upload failure
If the above error message is shown, recheck the credentials and URLs. Also check your server access settings for SharePoint365, from an unmanaged device. If the access is Web-only or in the blocked state, the plugin will fail to upload to the destination.