solution Contentsolution Content

HP LaserJet Pro Printers - Replacing the Toner Cartridge

This document is for the following printers.
HP LaserJet Pro MFP M125a
HP LaserJet Pro MFP M127fs
HP LaserJet Pro MFP M125nw
HP LaserJet Pro MFP M127fw
HP LaserJet Pro MFP M125r
HP LaserJet Pro MFP M128fn
HP LaserJet Pro MFP M125ra
HP LaserJet Pro MFP M128fp
HP LaserJet Pro MFP M125rnw
HP LaserJet Pro MFP M128fw
HP LaserJet Pro MFP M126a
HP LaserJet Pro MFP M26a
HP LaserJet Pro MFP M126nw
HP LaserJet Pro MFP M26nw
HP LaserJet Pro MFP M127fn
Replace the toner cartridge when one of the following messages displays:
  • HP LaserJet Pro MFP M26a printers: An E0 message displays and the Attention light blinks on the printer control panel.
  • HP LaserJet Pro MFP M26nw, M125a, M125nw, M125r, M125ra, M125rnw, M126a, M126nw, M127fn, M127fs, M127fw, M128fn, M128fp, M128fw printers: A Cartridge is Low or a Cartridge is Very Low message displays on the printer control panel.

Replace the toner cartridge

To replace the toner cartridge, open the scanner assembly and top cover, remove the old toner cartridge, and then install a new one.
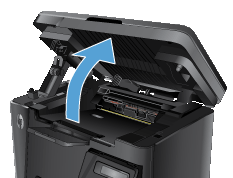
  1. Lift the scanner assembly.
    Figure : Lifting the scanner assembly
    Lifting the scanner assembly.
  2. Open the top cover.
    Figure : Opening the top cover
    Opening the top cover.
  3. Remove the toner cartridge.
    Figure : Removing the toner cartridge
    Removing the toner cartridge.
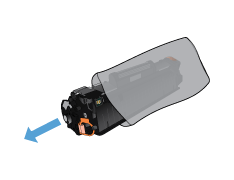
  4. Remove the new toner cartridge from the package.
    Figure : Removing the new toner cartridge from the package
    Removing the new toner cartridge from the package.
  5. Place the used toner cartridge in the bag for recycling.
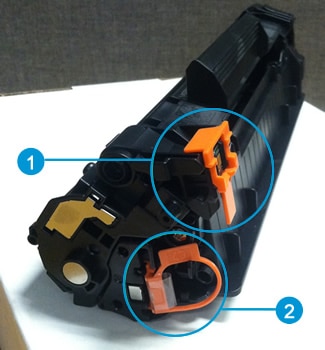
  6. Locate the orange clip on the new toner cartridge.
      Figure : Locating the orange clip on the new toner cartridge
      Locating the orange tabs on the toner cartridge.
    1. The orange clip
    2. The orange tab with sealing tape
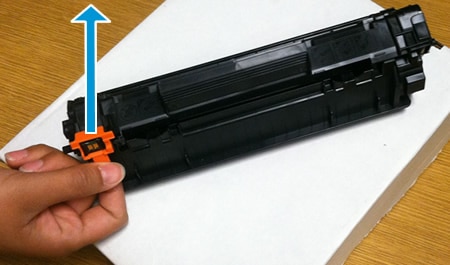
  7. Remove the orange clip by pulling upward.
    Figure : Removing the orange clip
    Removing the orange clip from the toner cartridge.
  8. Grasp both sides of the toner cartridge, and then distribute the toner by gently rocking the toner cartridge back and forth.
      caution:
    Do not touch the shutter or the surface of the roller.
    Figure : Gently rocking the toner cartridge
    Gently rocking the toner cartridge.
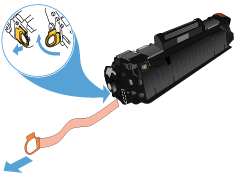
  9. Bend the tab on the left side of the toner cartridge until the tab breaks loose. Pull the tab until all the sealing tape is removed from the toner cartridge.
    Figure : Removing the sealing tape
    Removing the sealing tape.
  10. Place the tab and tape in the toner cartridge box to return for recycling.
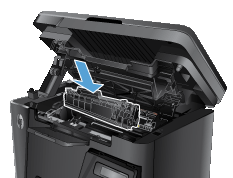
  11. Align the new toner cartridge with the tracks inside the printer, and then push the toner cartridge until it is firmly seated.
    Figure : Installing the toner cartridge
    Installing  the toner cartridge.
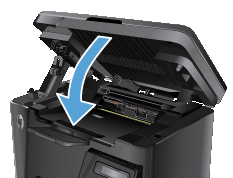
  12. Close the top cover.
    Figure : Closing the top cover
    Closing the top cover.
  13. Lower the scanner assembly.
    Figure : Lowering the scanner assembly
    Lowering the scanner assembly.

Frequently asked questions (FAQs)

Review the list of frequently asked questions about replacing toner cartridges.