Dust, paper fiber, and other debris might accumulate on the paper feed rollers and cause paper jams and paper feed issues. Use the following steps to clean the rollers inside the printer and the ADF, and then print a test page.
Before you begin to clean the rollers, gather the following materials:
-
A long, lint-free cotton swab
-
A clean, lint-free cloth, or any cloth that does not come apart or leave fibers
-
Distilled, filtered, or bottled water (tap water might damage the printer)
Step one: Clean the rollers inside the input tray
-
Gather the following materials:
-
A long, lint-free cotton swab
-
Distilled, filtered, or bottled water (tap water might damage the product)
-
Press the Power button to turn off the printer.
-
Disconnect the power cord from the rear of the printer, and then unplug the power cord from the power source or electrical outlet.
warning:
You must disconnect the power cord before reaching inside the printer to avoid risk of injuries or electric shock.
-
Disconnect the USB cable from the rear of the printer.
-
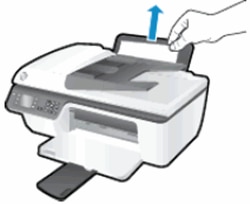
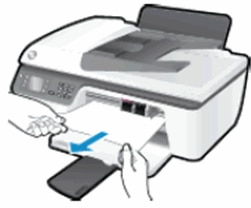
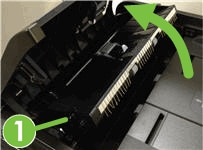
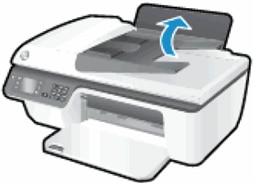
Raise the input tray.
Figure : Raise the input tray
-
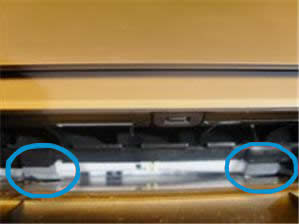
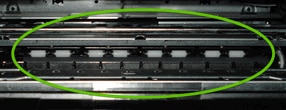
Look down through the open input tray and find the gray paper pick rollers. You might need a flashlight to illuminate the area.
Figure : Paper pick rollers
-
Dampen a long cotton swab with bottled or distilled water, and then squeeze any excess water from the cloth.
-
Press the swab against the rollers and rotate them upward with your fingers. Apply a moderate amount of pressure to remove dust or dirt buildup.
-
Allow the rollers to dry for 10 or 15 minutes.
-
Reconnect the power cord to the rear of the printer.
-
If the HP printer does not turn on, press the Power button.
Step two: Clean the rollers from inside the cartridge access area
-
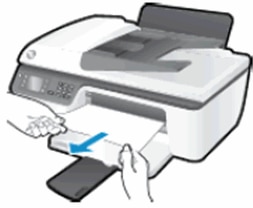
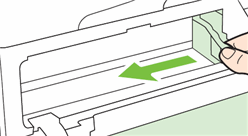
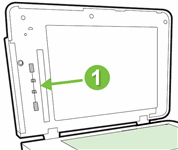
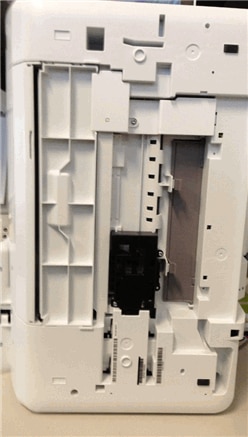
Place your fingers into the slot on the left side of the printer, and then pull forward to open the cartridge access door.
Figure : Open the cartridge access door
-
Lightly dampen the swab with distilled, filtered, or bottled water, and then squeeze any excess liquid from the swab.
-
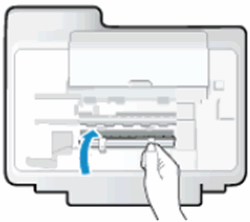
Press the swab against the rollers inside the printer, and then rotate the rollers upwards with your fingers. Apply a moderate amount of pressure to remove any dust or dirt buildup.
Figure : Clean the rollers in the cartridge access area
-
Allow the rollers to dry completely (approximately 10 minutes).
-
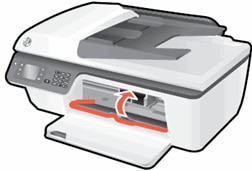
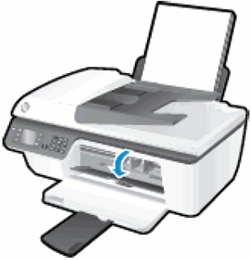
Close the cartridge access door.
Figure : Close the cartridge access door

Step three: Clean the rollers on the bottom of the printer
-
Gently set the printer on its left or right side.
Figure : Place the printer on its left or right side
caution:
Placing the printer in this position can make it unstable.
-
Lightly dampen the swab with distilled, filtered, or bottled water, and then squeeze any excess liquid from the swab.
-
Press the swab against the rollers inside the printer, and then rotate the rollers upwards with your fingers. Apply a moderate amount of pressure to remove any dust or dirt buildup.
Figure : Clean the bottom rollers

-
Allow the rollers to dry completely (approximately 10 minutes).
-
Carefully return the printer to its upright position.
Step four: Clean the rollers in the ADF
-
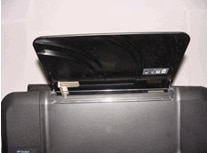
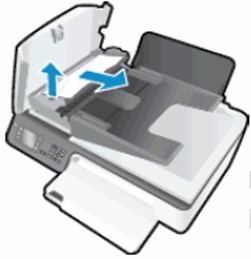
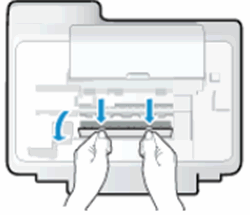
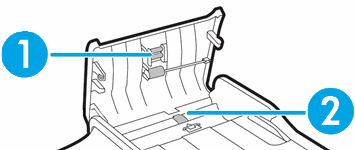
Lift the top cover of the ADF. This provides easy access to the rollers and separator pad.
Figure : Lift the ADF cover

-
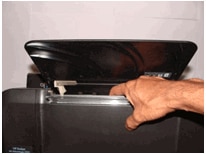
Lightly dampen a clean, lint-free cloth with bottled or distilled water, and then squeeze any excess liquid from the cloth.
-
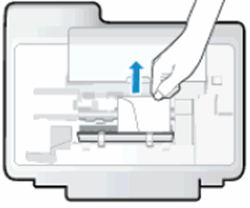
Press the cloth against the rollers, and then rotate them upward with your fingers. Apply a moderate amount of pressure to remove any dust or dirt buildup.
Figure : Clean the rollers and separator pad
-
Rollers
-
Separator pad
-
Allow the rollers to dry completely (approximately 10 minutes).
-
Close the ADF cover tightly at both ends.
-
Reconnect the power cord and the USB cable to the back of the product.
-
If the HP product does not turn on, press the Power button.
Step five: Print a Print a Printer Status Report
Print a test page to make sure that the hardware functions correctly.
How to print a test page
Follow these steps to print a test page.
-
Load plain white paper in the tray.
-
On the printer control panel, press the Down Arrow (

) to scroll to
Tools, and then press
OK.
-
Press the Down Arrow (
) to scroll to
Printer Status Report, and then press
OK. The test page prints.
-
If these steps resolved the issue, and the test page prints, you can stop troubleshooting.
-
If the test page prints successfully, but you continue to experience an issue with your printer, then the issue is not related to the hardware.
-
Experiencing another issue?
If your printer prints a test page and there is still an issue with your printer, go to
HP Customer Support, type your printer model, and then browse for the appropriate support document to troubleshoot the issue.
-
If the printer does not print a test page, there is an issue with the printer hardware. Continue to the next solution.
 Important: You must follow these solutions in the order presented to resolve the issue.