
Officejet Enterprise Color X585 Multifunction Printer - Removing and Installing Ink Cartridge
See title for description. This video does not contain any audio.
The product uses four colors and has a different ink cartridge for each color: yellow (Y), cyan (C), magenta (M), and black (K).
-
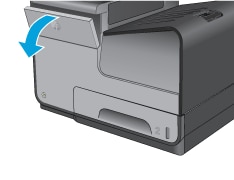
Open the ink cartridge door.Figure : Open the cartridge door
-
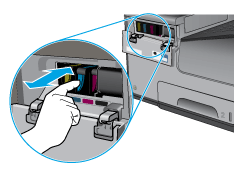
Push the old ink cartridge inward to unlock it.Figure : Release the ink cartridge
-
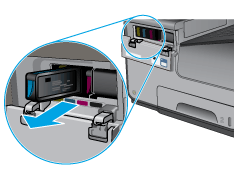
Grasp the edge of the old ink cartridge and then pull the cartridge straight out to remove it.Figure : Remove the ink cartridge
-
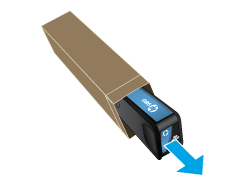
Remove the new ink cartridge from the packaging.Figure : Unpack the ink cartridge
-
Do not touch the gold-colored metal contacts of the ink cartridge. Fingerprints on the contacts can cause print-quality problems.Figure : Do not touch the contact

-
Insert the new ink cartridge into the product. Push the cartridge until it “clicks” into place.Figure : Insert the ink cartridge

-
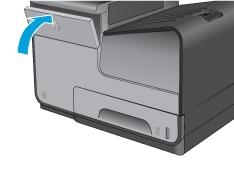
Close the ink cartridge door.Figure : Close the cartridge door
-
Place the old cartridge in the box and refer to information about recycling used ink cartridges on the ink cartridge box.
