Scenario
AutoCAD: a plotter configuration file or PC3 file enables one to easily configure and save settings for later
use. Set up multiple configuration files for the same plotter by selecting a different configuration in the Plot
dialog box.
PC3 is used by AutoCAD to store most of the driver settings for a Plot; it is useful to have different setting
configurations for the same printer. Problems can arise when PC3 files are used by customers to send plot
settings to another user.
Previous drivers from older printers like the HP Designjet 500/4000/5000 Printer Series allowed users to
create custom paper sizes by generating unique PC3 and PMP files for each required size. These files could be
stored in a central location on the user’s servers and shared to others. These custom paper sizes and setups
could also be saved to several standard template files. The process worked well.
Previous drivers had a limit to the number of custom page sizes that could be saved; this was a big
inconvenience for many of our customers. In order to solve the issue, the way of saving page sizes has been
changed in the latest drivers. This change now means that page sizes cannot be stored in PC3 files.
PC3 files do not contain the custom paper for our current printers anymore, so when sending a PC3 file
containing plot settings to another user, the custom paper is not propagated. It works fine as long as default
paper sizes are given, but when you create a custom paper size and try to save it in a new PC3 file and the
other user receives it, it does not work; a default paper is used instead.
We are working to solve this issue in the near future. Meanwhile here is a Workaround:
Proposed Solution: Use of Forms in Server driver
Summary:
Define the custom page size to be used with PC3 within a FORM on a server driver, and then all clients can
install the driver from the server. The custom Form is passed to all clients, and now works when sharing PC3
files.
Detailed Steps FOR SERVER:
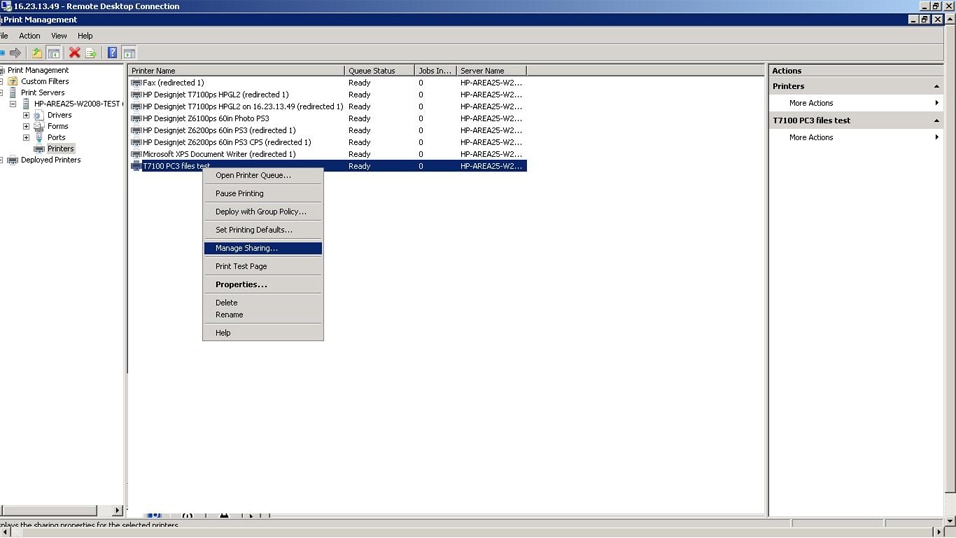
Step 1 - Select the printer to be shared:

Step 2 - Open the shared printer’s properties:
Step 3 - Set user permission for the shared printer:

Step 4 - Add additional drivers if needed:

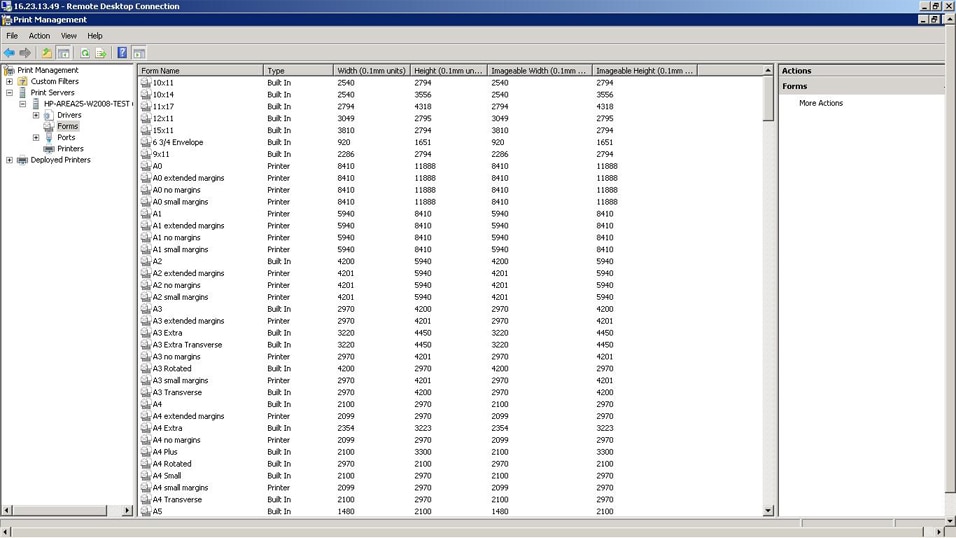
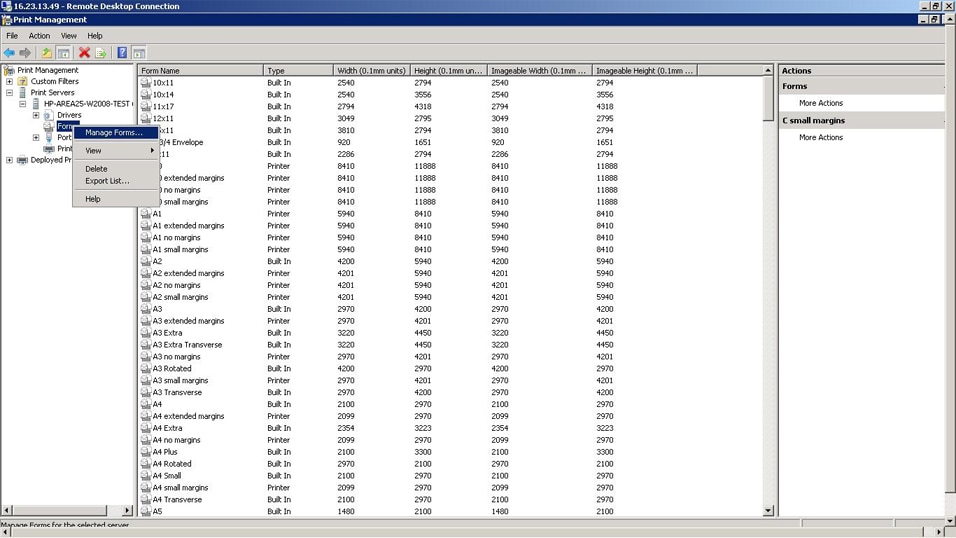
Step 5 - Go to Server forms manager to create the form that will be used in the shared PC3 files:
Step 6 - Create a new form for the PC3 shared file:
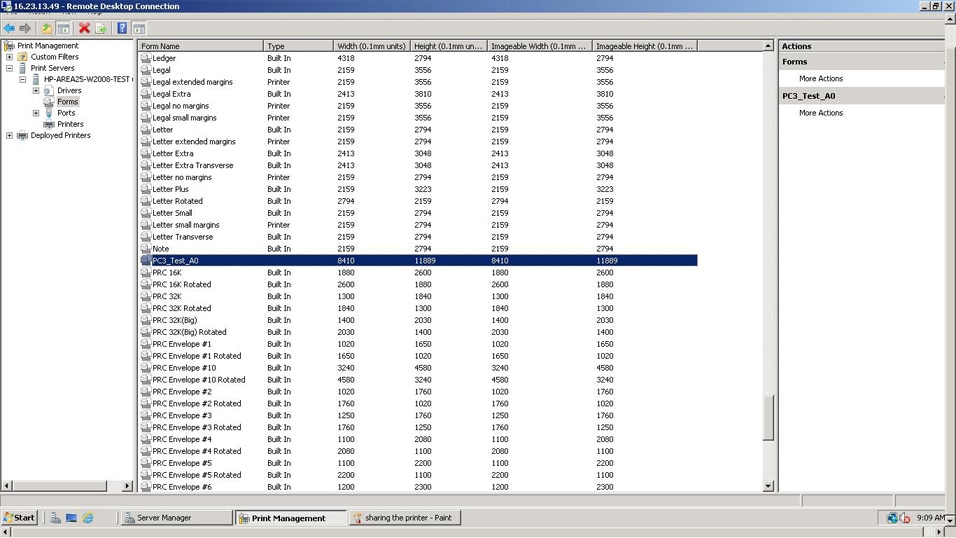
Step 7 - Create a new form based on a default A0 form:

Step 8 - The new form appears in the server form list:
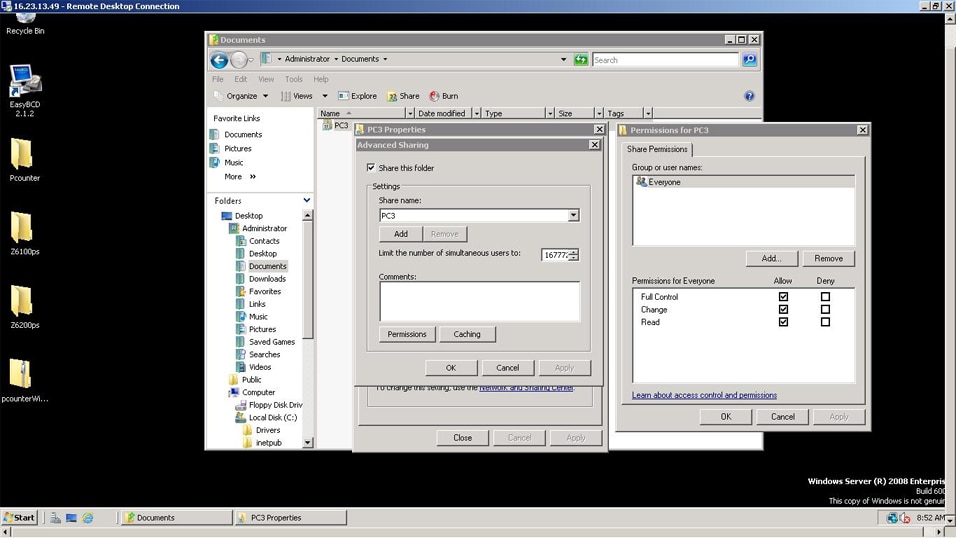
Step 9 - Create a shared folder to share the PC3 files between users:

Step 10 - Share the folder and select ‘set permissions’ for all users:
Detailed Steps ON CLIENTS:
Step 1 – Log on as the system administrator and add the shared printer:

Step 2 - Add the shared printer using the server’s IP address:

Step 3 - Add the printer; the installer will look for drivers:

Step 4 - Add the printer; the installer will download and install the drivers:

Step 5 - AutoCAD 2012: change the default PC3 files folder to the shared folder on the server; select the
‘Option’ button in the main menu:

Step 6 – Add the shared path using the ‘Add’ button, then use the ‘Remove’ button to remove the default path
on the local computer:

Step 7 - In the main menu select ‘Manage Plotters’ to setup a PC3 file, this file will be saved in the new path
selected previously:

Step 8 - Select ‘Add a plotter wizard’ to create a new PC3 file:
Step 9 - Select ‘Next’:

Step 10 - Select ‘System Printer’ and click ‘Next’:

Step 11 - Select the ‘System Printer’ installed on the local client:

Step 12 - Click on ‘Next’ to create a new PC3 configuration file:

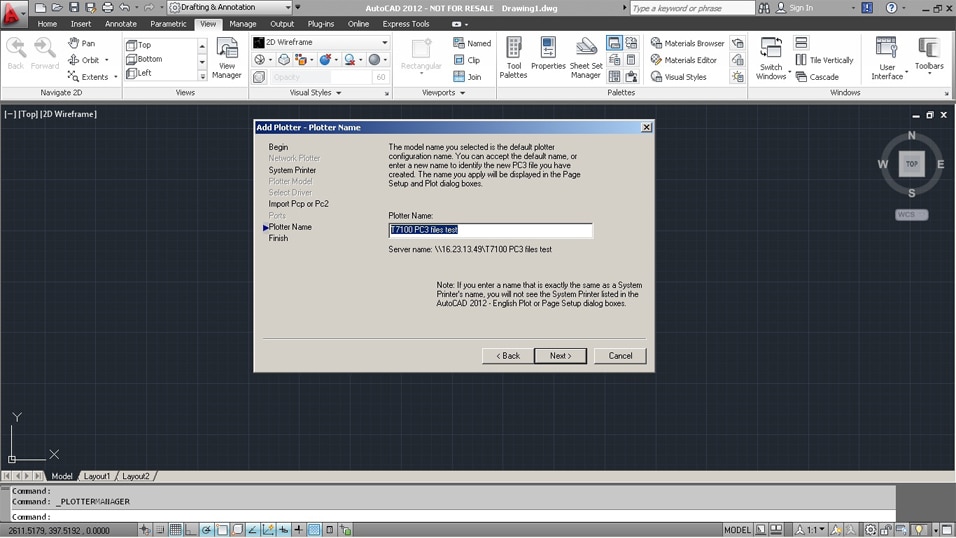
Step 13 - Select the PC3 file name:
Step 14 - Click on ‘Edit Plotter Configuration’ to select the form from the server:

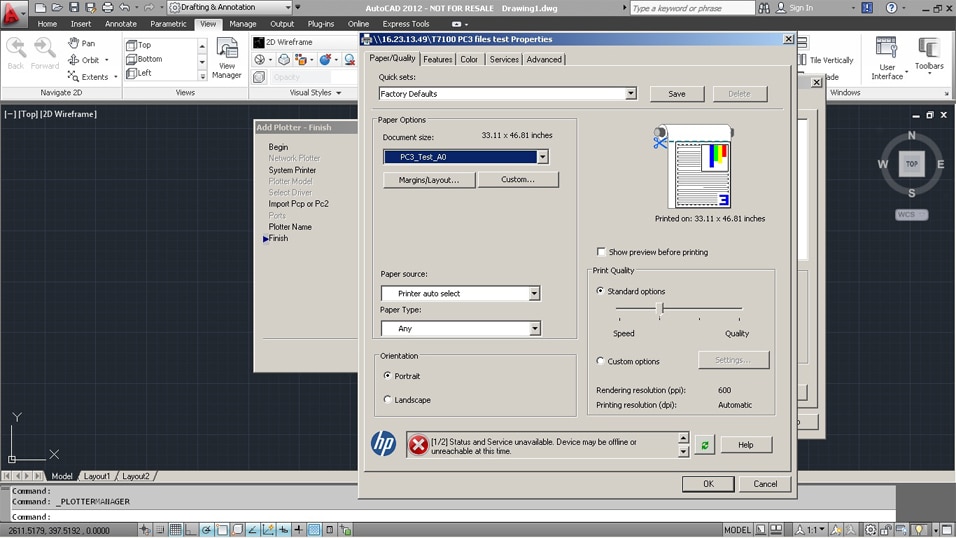
Step 15 - Click on the ‘Custom Properties’ button to select the printer driver preferences dialog box:

Step 16 - In the printer driver dialog box paper options, select the ‘Custom’ button and scroll down to select
the form that is shared on the server:

Step 17 - Select the document size and press ‘OK’ to return to the wizard:
Step 18 - The custom page size is selected and will be used in the PC3 file as default:

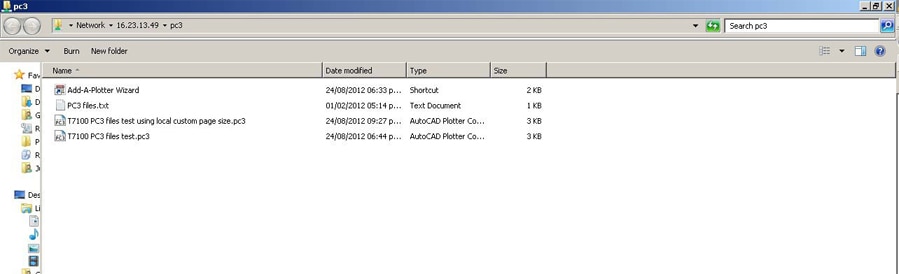
Step 19 - Close the wizard; the new PC3 file appears in the shared folder, and is now available for other users:

If the PC3 file is used without the common server form, attempting to use it will require making
changes in the file and saving it again:

Step 20 - AutoCAD 2012 will request to update the PC3 file with the proper device, this will start a loop since
the form won't be found due to the fact it doesn't exist on the local client:

