solution Contentsolution Content

HP Deskjet D2600 Series Printers - Setting Up a New Printer

This document is for HP Deskjet D2645, D2660, D2663, D2666, D2668, and D2680 printers.
This document explains the basics of setting up the printer hardware. This document does not explain how to operate the printer.

Step 1: Unpack the printer

  1. Remove any tape and packing materials from outside the printer.
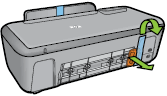
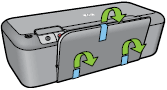
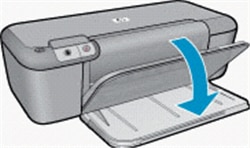
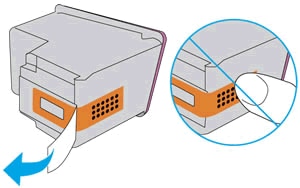
    Figure : Remove outside packaging
    Image of outside packaging being removed.
    Another image of outside packaging being removed.
  2. Open the ink cartridge door, and then remove any tape and packing materials from inside the printer.
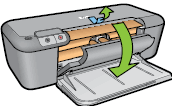
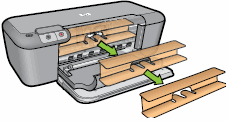
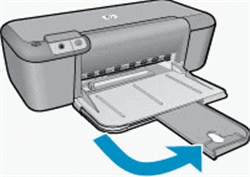
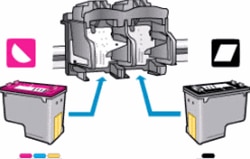
    Figure : Remove inside packaging
    Image of inside packaging being removed.
    Another image of inside packaging being removed.

Step 2: Check the contents of the box

The contents might vary by country/region. See the packaging for a list of items shipped in the box.

Step 3: Connect the power cord and adapter

Connect the power adapter to the back of the printer, and then connect the power cord to the power adapter and to the electrical outlet.
    Figure : Connect the power cord and adapter
    Image of power cord and adapter being plugged in.
  1. Connect power adapter to back of printer
  2. Connect power cord to back of printer and to the electrical outlet

Step 4: Turn on the power and lower the paper tray

  1. Press the Power button to turn on the printer.
  2. Lower the paper tray.
    Figure : Lower the paper tray
    Image of lowering the paper tray.

Step 5: Load plain paper

  1. Pull out the paper tray extension.
    Figure : Pull out the paper tray extension
    Image of the paper tray extended.
  2. Flip up the paper stop at the end of the extension.
  3. Slide the paper-width guide all the way to the left.
  4. Load a stack of 216 x 279 mm (8.5 x 11 inch) plain paper into the paper tray, print-side down. Slide the stack of paper forward until it stops.
    Figure : Load paper
    Image of loaded paper.
  5. Slide the paper-width guide snugly against the paper.

Step 6: Install the ink cartridges

  1. Press the Power button to turn on the printer, if it is not already turned on.
  2. Open the ink cartridge door.
    The carriage moves to the center of the printer.
    Figure : Open the ink cartridge door
    Image of opening the ink cartridge door.
  3. Wait until the carriage is idle and silent before you continue.
  4. Remove the new ink cartridge from its packaging, and then carefully remove the plastic tape using the pull tab.
      caution:
    Do not touch the copper-colored contacts or ink nozzles. Also, do not re-tape the ink cartridges. Doing so can result in clogs, ink failure, and bad electrical connections.
    Figure : Remove the plastic tape
    Image of removing the tape from the new ink cartridge
  5. Hold the ink cartridge by its sides with the nozzles toward the printer, and then insert the ink cartridge into its color-coded slot until it snaps into place. Make sure the icon on the ink cartridge matches the icon on the slot.
    Figure : Example of inserting the tri-color ink cartridge
    Illustration of inserting the ink cartridge.
    • Insert the tri-color ink cartridge in the slot on the left.
    • Insert the black ink cartridge in the slot on the right.
    Figure : Color-coded ink cartridge slots
    Illustration of the ink cartridges and their slots.
  6. Close the ink cartridge door.
    Figure : Close the ink cartridge door
    Illustration of closing the ink cartridge door.

Step 7: Install the software

Use one of the following options to install the HP software. The software installer prompts you to connect your USB cable. Do not connect the USB cable before the prompt.

Download and install the software from the web

  1. Turn on the printer.
  2. Disconnect the USB cable from the printer, if necessary. The software installation prompts you to connect the cable if needed.
  3. If a Let's identify your product to get started page displays, click Printer, type your printer model number, and then click Submit.
  4. If you need to change the operating system, click Change, select your version, and then click Change.
  5. Under the Driver heading, click Download for the full software package, or click Basic Drivers for other driver options.

Install the software from the printer CD

Follow these steps to install the software using the product CD.
  caution:
Do not connect the USB cable until prompted to do so during software installation. HP recommends using a USB cable that is less than 3 m (10 feet) long.
note:
If you get any firewall messages during installation, click unblock or accept, or the installation fails.
  1. Insert the software CD into the CD drive of the computer. The software installer starts automatically.
    note:
    If the User Account Control screen opens, click Allow to continue.
  2. Follow the on-screen instructions to finish installing the software.

Step 8: Align the ink cartridges

  1. Make sure that unused, plain, white paper is loaded in the input tray.
  2. Double-click the HP Solution Center icon () on the Windows Desktop.
    You can also open HP Solution Center by following these steps.
    • Windows XP: Click Start, click All Programs, point to HPO, and then click HP Solution Center.
    • Windows Vista: Click the Windows icon (), click All Programs, click HP, and then click HP Solution Center.
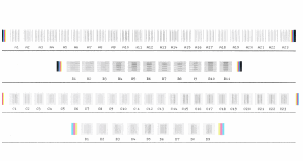
  3. In HP Solution Center, click Settings.
  4. In the Print Settings area, click Printer Toolbox.
  5. Click the Device Services tab.
  6. Click Align the Print Cartridges.
  7. Click Align. The product prints a page of patterns.
    Figure : Example of an alignment page
    Example of an alignment page
  8. Review the page of patterns, and then answer the questions that display on the computer.
note:
For best print quality, HP recommends that you align the cartridges each time you install a new cartridge.