This document is for the LaserJet Pro MFP M127fn, M128fn, and M128fp printers.
HP LaserJet Pro Printers - Setting Up the Printer Hardware
Introduction
This document explains how to set up the physical parts of the product. Complete these steps before you install the product software on your computer.
Setting up the printer
Follow these steps in order.
Step 1: Check the contents of the box
The contents might vary by country/region. See the packaging for a list of items shipped in the box.
Step 2: Remove the packaging, and then prepare the printer
Follow these steps to remove all the packaging material from the printer, and then prepare the printer for use.
-
Take the printer out of its box, and then remove the packaging.
-
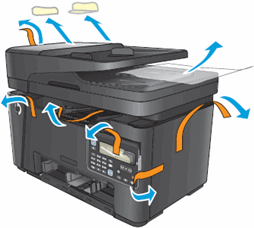
Place the printer in a sturdy, well-ventilated, dust-free place away from direct sunlight.
-
Remove the packing tape from the printer.Figure : Remove the packing tape from the printer
-
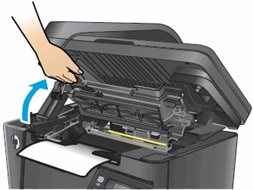
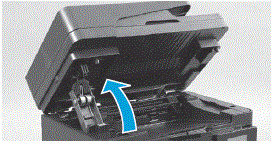
Lift the scanner assembly, and then open the top cover.Figure : Lift the scanner assembly, and then open the top cover
-
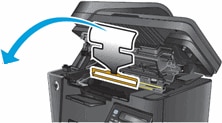
Remove the protective foam from the cartridge access area.Figure : Remove the protective foam

-
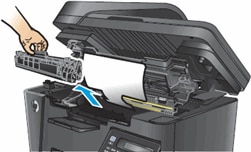
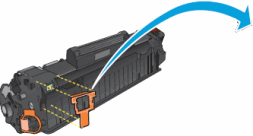
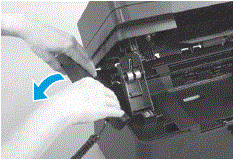
Remove the print cartridge, and then set it aside in a secure place.Figure : Remove the print cartridge
-
Remove packing materials from inside the printer.Figure : Remove packing materials from inside the printer
-
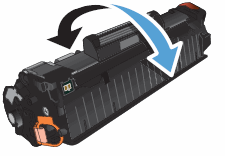
Grasp both sides of the print cartridge, and then gently rock the cartridge back and forth to distribute the toner.Figure : Gently rock the print cartridge
-
Remove the orange clip from the print cartridge.Figure : Remove the orange clip from the print cartridge
-
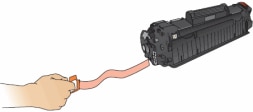
Pull out the orange tab to remove the sealing tape from the print cartridge.Figure : Remove the sealing tape from the print cartridge
-
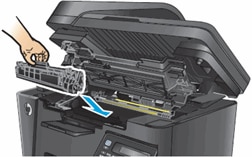
Align the print cartridge with the tracks inside the printer, and then insert the print cartridge until it is firmly seated.Figure : Insert the print cartridge
-
Close the top cover, and then close the scanner assembly.
-
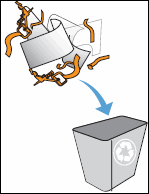
Recycle the packing materials.Figure : Recycle the packing materials
-
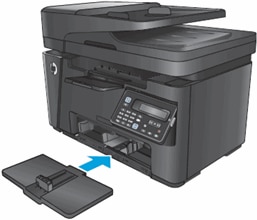
Attach the input tray to the printer.Figure : Attach the input tray to the printer
Step 3: Load paper
Follow these steps to load paper in the paper input tray.
-
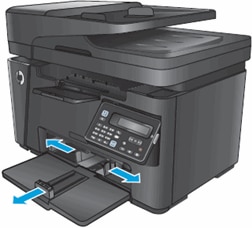
Slide the paper guides to their outermost positions.Figure : Slide the paper guides out
-
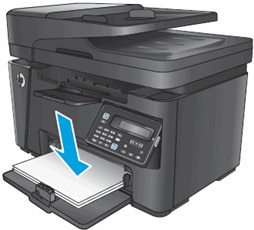
Load a stack of U.S. letter or A4 size paper into the input tray with the short edge forward and the print side up. Push the stack into the tray until it stops.Figure : Load paper into the input tray
-
Slide in the paper guides until they rest against the edges of the paper.
note:
Do not push the paper guides so far in that they bind the paper.Figure : Slide the paper guides in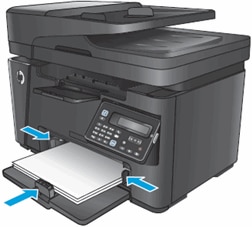
Step 4: Connect the power cord, and then turn on the printer
-
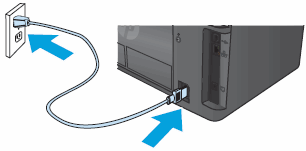
Connect the power cord to the rear of the printer.
-
Plug the power cord directly into an electrical outlet.Figure : Connect the power cord
-
Press the Power button to turn on the printer. The printer initializes and then calibrates itself.
note:
Wait until the printer is idle and silent before you proceed.
Step 5: Select the language
During the initialization process, the Language menu displays.
Press the Right Arrow button ( ) until your preferred language displays, and then press OK.
) until your preferred language displays, and then press OK.
Step 6: Install the optional telephone handset (M128fp model only)
If your printer comes with an optional telephone handset, follow these steps to install it on the printer.
-
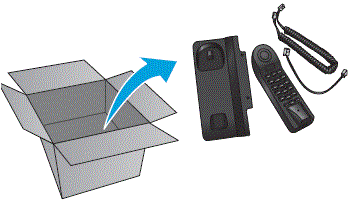
Remove the handset, handset cord, telephone platform, and telephone cord from the box.Figure : Remove the handset from the box
-
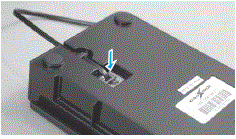
Turn the telephone platform over, and then insert one end of the telephone cord into the port on the bottom of the telephone platform.Figure : Attach the telephone cord to the telephone platform
-
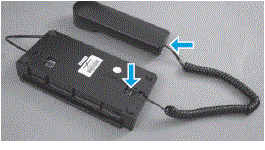
Insert one end of the handset cord into the port on the handset, and then insert the other end of the handset cord to the port on the telephone platform.Figure : Attach the handset cord
-
Lift the top cover.Figure : Lift the top cover
-
Lay the handset on the table near the printer, and then place the long slot on the edge of the handset platform onto the right side of the printer.Figure : Install the handset platform
-
Connect the telephone cord to the telephone port on the rear of the printer.Figure : Connect the telephone cord to the telephone port

-
Close the top cover.
-
Connect one end of a second telephone cord to the fax port on the rear of the printer, and then connect the other end to a telephone jack on a nearby wall.
Link to fax setup instructions
For instructions on how to set up your printer to send and receive faxes, click the following link.
|
Set up the printer to send and receive faxes
|
Enter a topic to search our knowledge library
What can we help you with?

Need Help?