This document applies to HP OMEN 15 Notebook computers.

warning:Before starting, power off the computer and wait for components to cool before starting these procedures.
caution:This product contains components that can be damaged by electrostatic discharge (ESD). To reduce the chance of ESD damage, work over a non-carpeted floor, use a static dissipative work surface (such as a conductive foam pad), and wear an ESD wrist strap connected to a grounded surface.
caution:Procedures in this document are provided by HP for qualified service agents and as a courtesy to its customers. Servicing internal components increases the risk of damaging the computer which might not be covered under warranty. Understand the risk and refer to the product's warranty before attempting to service the computer.

note:The video and graphics in this article depict a specific configuration of the notebook. The same removal and replacement procedures apply to all configurations of the notebook.
warning:Make sure the computer is disconnected from power before starting.
|
Step 1
Remove the base enclosure.
note: |

|
|
Step 2
Remove the battery.
note: |

|
|
Step 3
Remove the heat sink assembly
note: |

|
|
Step 4
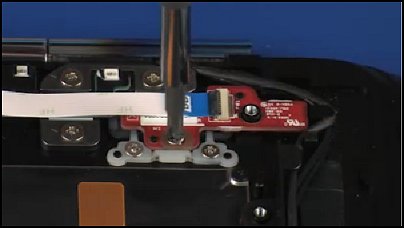
Using minimal force, lift the locking bar up on the power button board ZIF connector...
|

|
|
...and disconnect the power button board ribbon cable from the system board.
|
|
|
Step 5
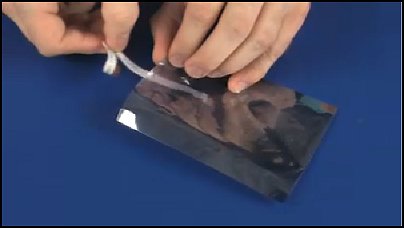
Using a non-marring prying tool, remove the power button board ribbon cable from the adhesive that secures it to the top cover.
|
|
|
Step 6
Using a Phillips-head screwdriver, remove the screw that secures the power button board to the top cover.
|

|
|
Step 7
Lift the power button board off of the alignment pins on the top cover.
|

|
|
Step 8
Place the power button board into a static dissipative bag.
|
|
|
Step 1
Remove the power button board from the static dissipative bag.
|
|
|
Step 2
Place the power button board onto the alignment pins on the top cover.
|

|
|
Step 3
Using a Phillips-head screwdriver, replace the screw that secures the power button board to the top cover.
|
|
|
Step 4
Using tweezers or a pair of needle-nose pliers, insert the power button board ribbon cable into the power button board ZIF connector on the system board...
|
|
|
...and press the locking bar down to lock the cable into place.
|
|
|
Step 5
Apply pressure to the length of the power button board ribbon cable to adhere it to the top cover.
|

|
|
Step 6
Replace the heat sink assembly.
note: |
|
|
Step 7
Replace the battery.
note: |
|
|
Step 8
Replace the base enclosure.
For instructions on replacing the base enclosure, see the HP support document Removing and replacing the base enclosure for HP OMEN 15 Notebook PC.
|
|
