solution Contentsolution Content

HP Color LaserJet Pro M280 Printers - First Time Printer Setup

This document is for HP Color LaserJet Pro MFP M280nw, M281cdw, M281fdn, and M281fdw printers.
To set up a printer for the first time, remove the printer and all packing materials from the box, load paper into the input tray, connect the power cable, set control panel preferences, and then download and install the printer software.
note:
If you are looking for the printer software, go to 123.hp.com/laserjet.
Step 1: Remove the printer from the box

Remove the printer from the box and all tape, stickers, and packing materials from the printer.
note:
The toner cartridges come preinstalled in your printer. You do not need to remove the toner cartridges from the printer.
  1. Remove the printer from the box.
  2. Remove all tape and packing materials from the outside of the printer, and then remove the protective film from the printer control panel.
  3. Recycle the packing materials.

Step 2: Load paper into the input tray

Load plain paper in the input tray.
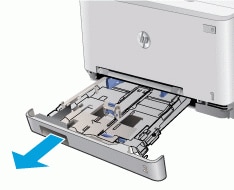
  1. Pull out the main input tray.
    Figure : Pulling out the tray
    Pulling out the tray
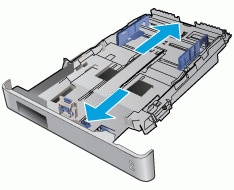
  2. Slide out the paper width and paper length guides as far as possible.
    To load legal-size paper, extend the tray front by pressing the blue latch and pulling the front of the tray.
    Figure : Sliding out the paper guides
    Sliding the paper width guides to their outermost positions.
    Figure : Extending the main input tray to accept legal-size paper
    Extending the main input tray to accept legal-size paper
  3. Load paper into the tray print side up with the top edge towards the printer. If you are loading pre-punched paper, load the paper with the holes toward the left side of the tray.
    Figure : Loading paper in the main input tray
    Loading paper
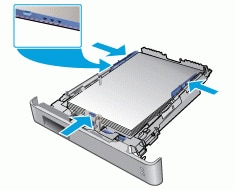
  4. Make sure the paper stack is flat at all four corners. Slide in the paper width and length guides until they touch the edges of the stack of paper.
    note:
    To prevent jams, do not overfill the tray. Make sure the top of the stack is below the tray full indicator.
    Figure : Sliding in the paper guides
    Sliding the paper guides inward
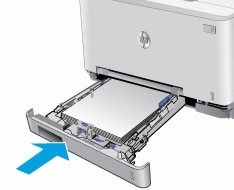
  5. Insert the tray into in the paper tray.
    note:
    When loaded with legal-size paper, the main input tray extends from the front of the printer approximately 57.5 mm (2.2 inches).
    Figure : Pushing in the main input tray
    Pushing in the main input tray

Step 3: Connect the power cord and set your preferences

Plug the printer into a wall outlet, turn on the printer, and then set your preferences.
note:
Do not connect a USB cable at this time. The connection to the computer is established during software installation.
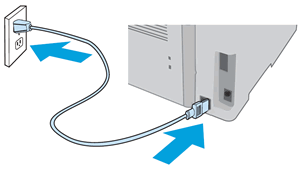
  1. Connect the power cord to the rear of the printer, and then plug the other end of the power cord into an electrical outlet.
    Figure : Connecting the power cord
    Connecting the power cord
  2. Turn on the printer.
  3. On the printer control panel, select your country/region and language, and then touch Yes.
  4. If prompted, select the date and time, and then touch Yes.
  5. When the Default Settings options display, select one of the following:
    • Self-Managed: Settings for environments like homes and home offices.
    • IT-managed: Settings for a connected office environment administered by an IT professional.
    You can also select Print Information Sheet to learn more about the different options.
Your HP printer hardware is now set up and you can install the printing software.

Step 4: Install the printer software

Download the latest version of the printing software from 123.hp.com/laserjet, and then follow the on-screen instructions to install the software.