This document applies to HP OMEN 880 Gaming PCs.
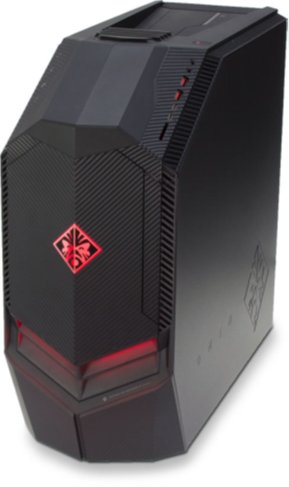

warning:Make sure the computer is disconnected from power before starting. Before starting, power off the computer and wait for components to cool before starting these procedures.
caution:This product contains components that can be damaged by electrostatic discharge (ESD). To reduce the chance of ESD damage, work over a non-carpeted floor, use a static dissipative work surface (such as a conductive foam pad), and wear an ESD wrist strap connected to a grounded surface.
caution:Procedures in this document are provided by HP for qualified service agents and as a courtesy to its customers. Servicing internal components increases the risk of damaging the computer which might not be covered under warranty. Understand the risk and refer to the product's warranty before attempting to service the computer.

|
Step 1
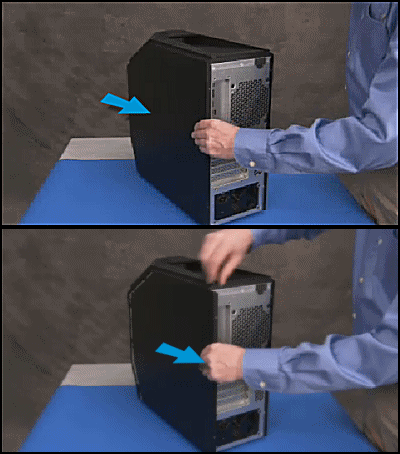
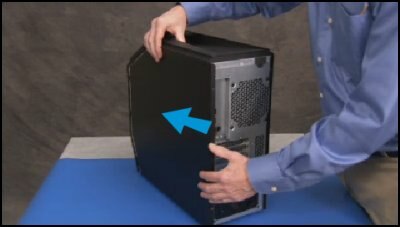
Remove the right side cover.
For detailed instructions, see Remove and Replace the Right Side Cover on the HP OMEN 880 Gaming PC.
|
|
|
Step 2
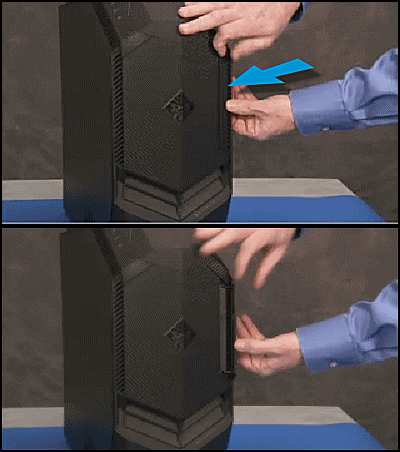
Flip open the optical drive door on the front cover.
|
|
|
Step 3
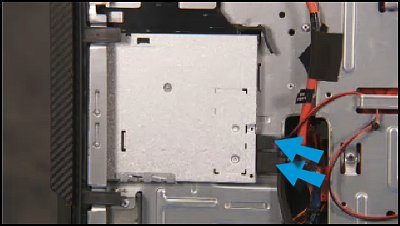
Detach the SATA power and data cables from the rear of the drive.
|
|
|
Step 4
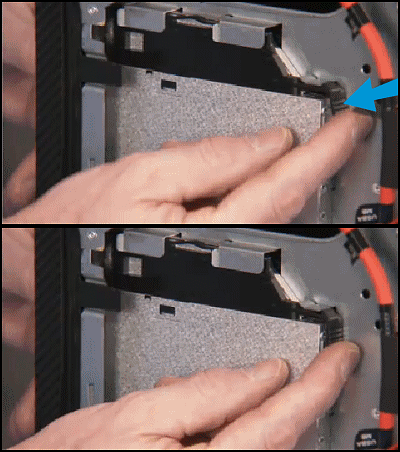
Press on the black plastic drive latch at the top rear of the drive...
|
|
|
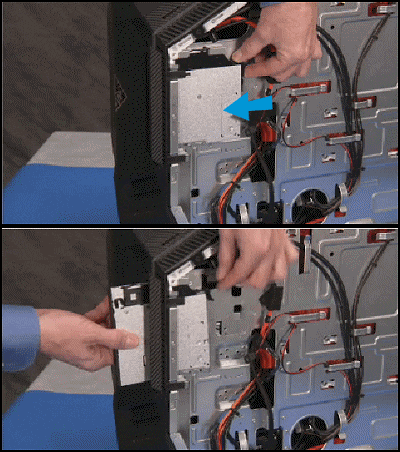
... and push the optical drive out the front of the computer.
|
|
|
Step 5
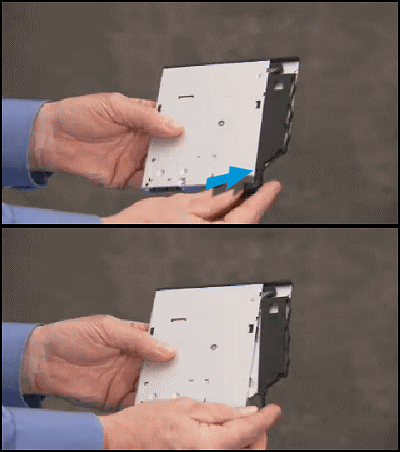
If you are replacing the optical drive, remove the black plastic latch on the drive.
To remove the latch, pry the latch off of the side of the drive. Save the latch to attach to the new optical drive.
|
|
|
Step 1
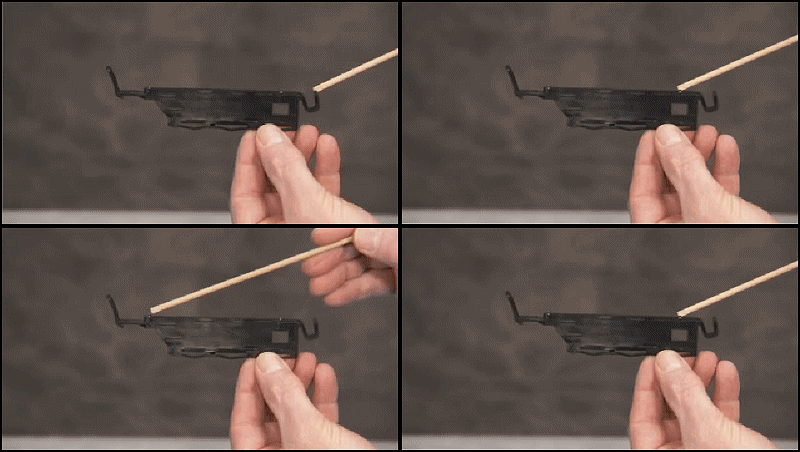
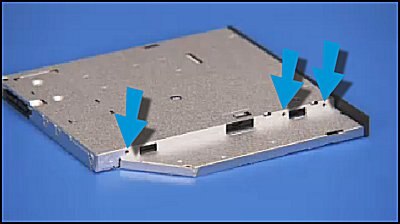
To install a new optical drive into the unit, first install the plastic latch on the new drive.
The plastic latch has three small alignment pins...
|
|
|
... that fit into three small holes on the optical drive.
|
|
|
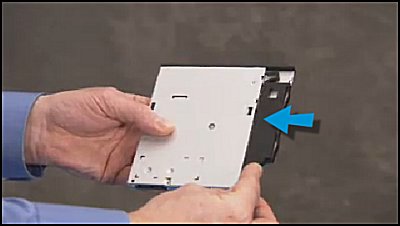
Step 2
To install the latch, press the pins into the holes until the latch is secure.
|
|
|
Step 3
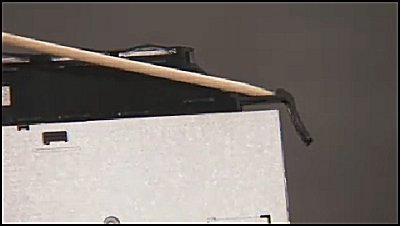
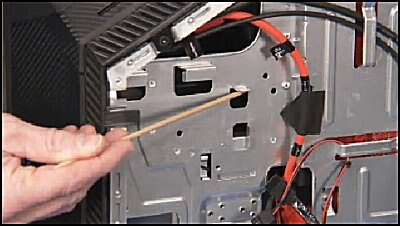
There is a small edge on the optical drive latch...
|
|
|
...that fits over a small metal edge on the right side of the computer.
|
|
|
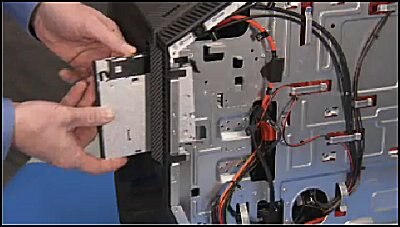
Step 4
Align the drive into its bay with the latch on the top side of the drive.
|
|
|
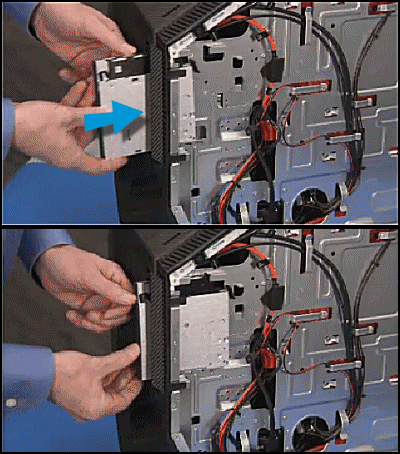
Step 5
Slide the drive into its bay from the front...
|
|
|
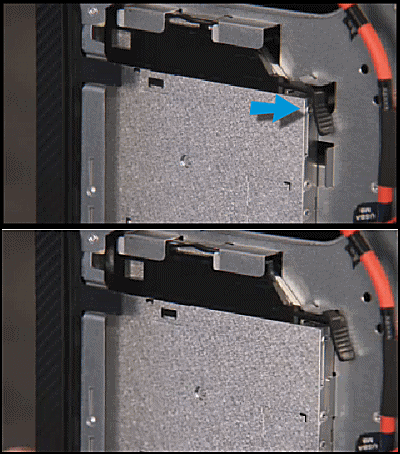
...until the latch snaps into place.
|
|
|
Step 6
Reattach the SATA power and data cables to the rear of the optical drive.
|

|
|
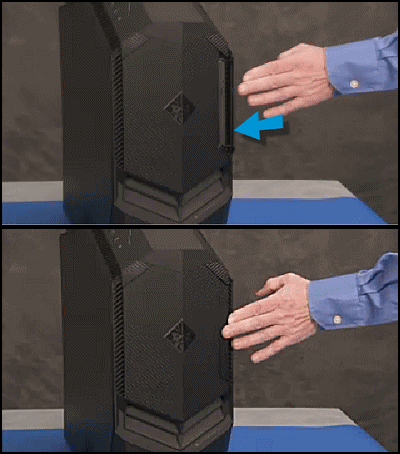
Step 7
Close the optical drive door on the front cover.
|
|
|
Step 8
Replace the right side cover.
For detailed instructions, see Remove and Replace the Right Side Cover on the HP OMEN 880 Gaming PC.
|
|