solution Contentsolution Content

HP DeskJet, ENVY, OfficeJet Printers - Cannot Print From Photo Tray

This document is for HP DeskJet Ink Advantage 5575, 5645, ENVY 5540, 5541, 5542, 5543, 5544, 5546, 5640, 5642, 5643, 5644, 5646, 5660, 5661, 5663, 5664, 5665, 7640, 7643, 7644, 7645, OfficeJet 5740, 5741, 5742, 5743, 5745, and 5746 printers.
When trying to print photos from the photo paper tray, the photo prints on paper from the main tray or one of the following errors displays.
  • Photo Tray was changed because of a conflict with another printer setting
  • Printer out of paper
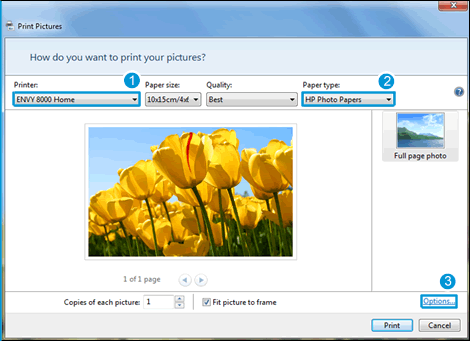
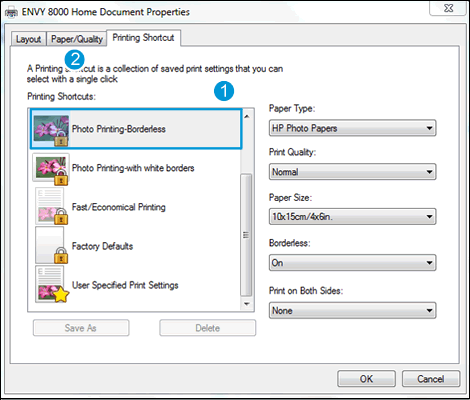
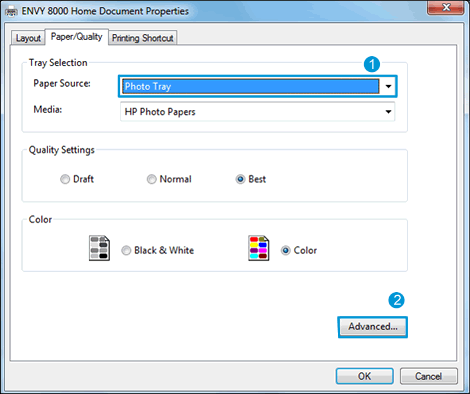
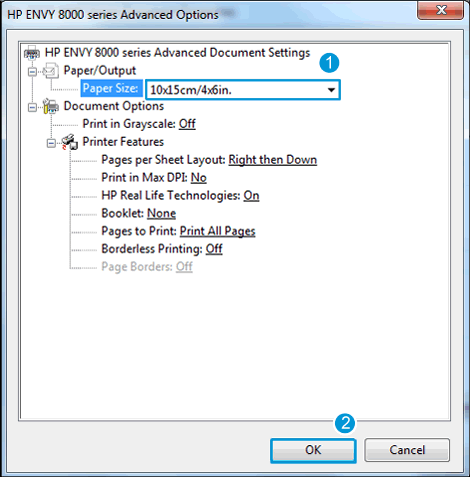
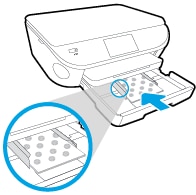
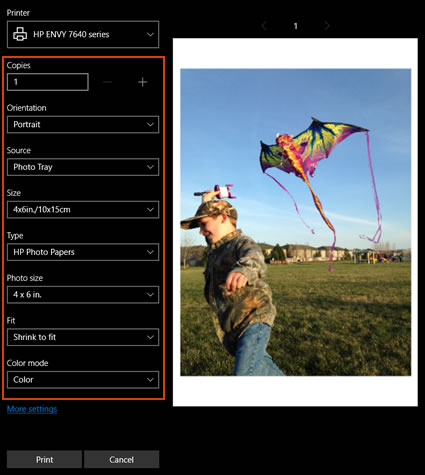
To resolve the issue, confirm the print settings in the photo app you are using, such as selecting the photo paper tray, paper type, and paper size are set for your print job.
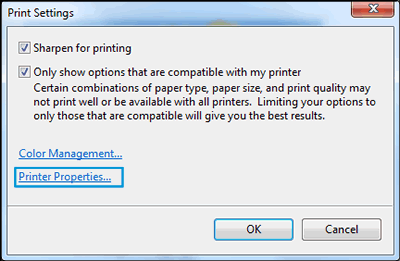
Step 1: Load photo paper in the photo tray

Load photo paper in the photo paper tray to help ensure that it is picked up by the printer correctly.
  1. Turn the printer on if it is not already on.
  2. Pull the photo tray inside the input tray toward you to open it as far as possible.
    megjegyzés:
    If you do not see the photo tray inside the input tray, remove the output tray, and then open the photo tray.
    Ábra : Pull out the photo tray inside the input tray
    Image: Pull out the photo tray inside the input tray
  3. Slide the paper width guides to their outermost positions.
    Ábra : Slide the paper-width guides to their outermost positions
    Image: Slide the paper-width guides to their outermost positions
  4. Load the photo paper with the short edge forward and the print side down into the photo tray.
    megjegyzés:
    For photo paper with a perforated tab, load the paper in the tray print-side down with the perforated tab closest to you.
    Ábra : Load photo paper in the paper tray with the print side down
    Image: Load photo paper in the paper tray with the print side down
  5. Slide the paper forward until it stops.
    megjegyzés:
    Make sure that the stack of photo paper is not higher than the top edges of the paper width guides.
  6. Slide the paper width guides inward so that they lightly rest against the edges of the photo paper and make sure that the photo paper is centered in the tray.
    Ábra : Adjust the paper-width guides
    Image: Adjust the paper-width guides
  7. Reinstall the output tray on the input tray, if you removed it, and then push the input tray into the printer until it locks into place.

Step 2: Set up the print job

Adjust the print settings in the app or operating system you are printing from to use the photo paper tray.