solution Contentsolution Content

HP DesignJet T2600 and DesignJet XL 3600 36-in Multifunction Printer - Configure a scan-to-network

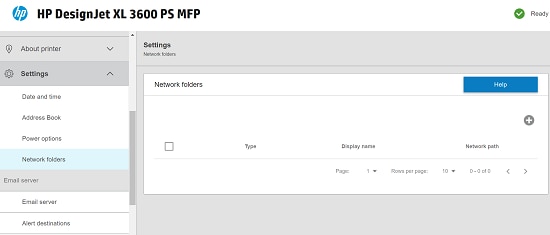
A scanned file may be saved in a USB flash drive, in a network folder or on the printer HDD. The USB flash drive or printer HDD options require no preparation, but the network folder option will not work until at least one has been properly set up.
note:
The printer accesses shared folders (as a client) using SPNEGO-based authentication, which negotiates the most secured protocol supported by both the printer and the server.

Scan to network folder

  1. Create a folder on a computer that the scanner can access through the network. See Example: Create a scan-to-network folder under Windows or Example: Create a scan-to-network folder under Mac OS.
  2. Create a user account on the same computer for the printer 'scanner user'.
  3. Change the sharing options of the folder so that it is shared with the 'scanner user' and assign full control of the folder to that user.
  4. Create a share name for the folder.
  5. In the printer's Embedded Web Server, select the Settings tab and then Network folders.
  6. In the Network Folders page, click on and fill in the various fields.
    • Protocol will be SMB (Windows).
    • Display name should contain the name of the shared folder.
    • Network Path once shared, Network path is displayed in sharing properties. PC Name can be replaced by IP address (ex. \\server\share).
    • User name should contain the name of the 'scanner user'.
    • User password should contain the password of the 'scanner user'.
    • Domain name should contain the name of the domain in which the user name exists. If the 'scanner user' does not belong to any domain, leave this field empty.
    • In the Functionality Use drop-down, select the functionalities this shared folder will be available in; Print & Scan, Print Only, Scan Only or None.
    • Toggle Browse Network Folder Structure to allow users to browse the network folder in the printer control panel.
    • In Authentication Requirements, select the required credentials for the network folder:
      1. None: To access the share anonymously (note that the network folder should be configured to allow such access).
      2. Automatic login using the following credentials: To save the credentials to be used for accessing the network folder in the printer. The credentials will be stored encrypted in the printer and used whenever access to the network folder is required.
      3. Prompt for credentials when needed: To prompt the user on the printer control panel for the credentials when trying to access the network folder.
    • For an extra layer of security, select Always Use A Security PIN and Create a 4-digit security PIN that will be required at the printer's front panel before using the network folder.
  7. Click Apply to save the configuration.
    note:
    If the product has already been configured for scanning to the network and you now want to use a different shared folder, click
  8. The printer automatically checks that it can access the network folder. If not, see Cannot access the network folder or HP Designjet SmartStream (if installed as an accessory) cannot access the network folder.
    You can check at any later time that the shared folder remains accessible by clicking Test in the Embedded Web Server. A correctly configured shared folder can become inaccessible if the user’s password is changed, or if the shared folder is moved or deleted.

Example: Create a scan-to-network folder under Windows

  1. Create a new user account for the 'scanner user' on the remote computer. You can use an existing user account for this purpose, but it is not recommended.
  2. Create a new folder on the remote computer, unless you want to use an existing folder.
  3. Right-click the folder and select Properties.
  4. In the Sharing tab, click the Advanced Sharing button.
  5. Check the Share in this folder box.
  6. You need to ensure that the 'scanner user' has full read/write control over the shared folder. To do this, click Permissions and grant Full Control to the user (or to any suitable group that includes that user).
  7. If there is a Security tab in the Properties window for your folder, then you must also grant the same user Full Control over the folder in the Security tab. Only some file systems such as NTFS require this.
    The 'scanner user' can now access the folder and write files to it. Next, you must configure the printer to send scans to the folder.

Example: Create a scan-to-network folder under Mac OS

  1. Create a new user account for the 'scanner user' on the remote computer. You can use an existing user account for this purpose, but it is not recommended.
  2. Create or choose a folder on the remote computer. By default, Mac OS users have a Public folder that can easily be used for this purpose.
  3. Open the System Preferences application and select the Sharing icon.
  4. Make sure the 'scanner user' has Read & Write access to the folder.
  5. Click Options.
  6. Check the Share files and folder using SMB box, and make sure that the 'scanner user' is checked in the On column.
  7. Click Done. You will now see file sharing enabled and Windows sharing on.
    The 'scanner user' can now access the folder and write files to it. Next, you must configure the printer to send scans to the folder.