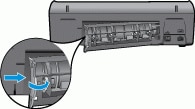
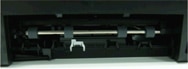
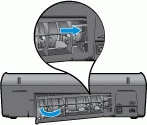
The message 'Paper jam' displays on the computer.
The following symptoms might also accompany this error:
-
The product stops printing
-
The Power button (
 ) blinks quickly

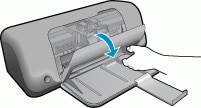
 ) to turn on the product.
