solution Contentsolution Content

HP LaserJet Pro MFP M28-M31 Printers - First Time Printer Setup

This document is for HP LaserJet Pro MFP M28a, M28w, M29a, M29w, M30a, M30w, and M31w printers.
To set up a printer for the first time, remove the printer and all packing materials from the box, load paper into the input tray, connect the power cable, and then download and install the printer software.
note:
If you are looking for the printer software, go to 123.hp.com/laserjet.
Step 1: Remove the printer from the box, and then remove packing materials

Remove the printer from the box and all tape, stickers, and packing materials from the printer.
  1. Remove the printer from the box.
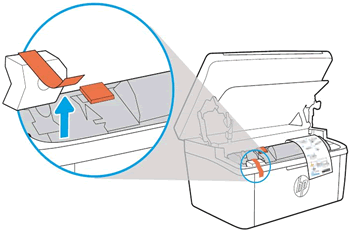
  2. Open the toner cartridge access door, and then remove the packing tape from inside the printer.
    Removing the packing tape from inside the printer
  3. Remove the toner cartridge.
    Removing the toner cartridge.
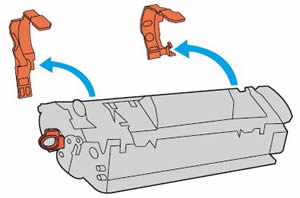
  4. Remove the clips from the toner cartridge.
    Removing the toner cartridge clips
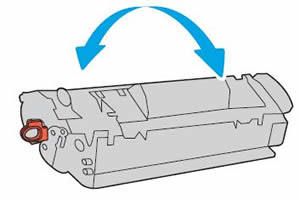
  5. Grasp both sides of the toner cartridge, and then gently rock the toner cartridge back and forth to distribute the toner.
    Rocking toner cartridge.
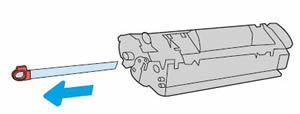
  6. Pull the orange tab to remove the sealing tape from the toner cartridge.
    Pull the orange tab to remove the sealing tape from the toner cartridge.
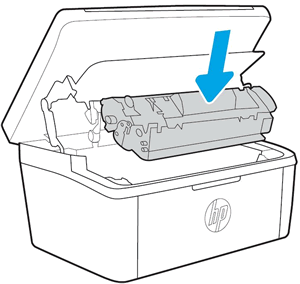
  7. Align the toner cartridge with the tracks inside the printer, and then push the toner cartridge until it is firmly seated.
    Insert the toner cartridge.
  8. Close the toner cartridge access door, and then recycle the packing materials.

Step 2: Load plain paper in the input tray

Load plain U.S. letter or A4 paper in the input tray.
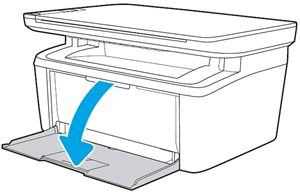
  1. Pull down the output tray.
    Pulling down the output tray
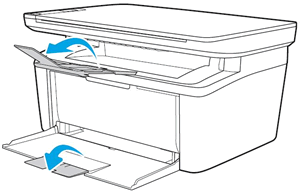
  2. Pull out the input and output tray extensions.
    Open the input and output extension trays
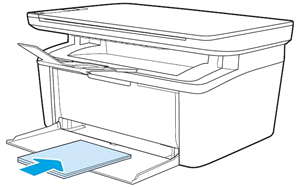
  3. Load a stack of U.S. letter or A4 size paper into the input tray with the short edge forward and the print side up. Push the stack into the tray until it stops.
    Loading paper into the input tray.
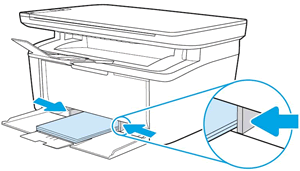
  4. Slide in the paper guides until they rest against the edges of the paper. Do not push the paper guides so far in that they bind the paper.
    Sliding in the paper guides.

Step 3: Connect the power cord, and then turn on the printer

Plug the printer into a wall outlet, and then turn on the printer.
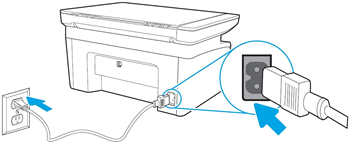
  1. Connect the power cord to the rear of the printer, and then plug the other end of the power cord into an electrical outlet.
    Connecting the power cord.
  2. Turn on the printer.

Step 4: Install the printer software

Download the latest version of the printing software from 123.hp.com/laserjet, and then follow the on-screen instructions to install the software.