This document is for the HP OfficeJet Pro 7740 Wide Format All-in-One Printer.
HP OfficeJet Pro 7740 Printers - Replacement Printer Instructions
When HP replaces your defective product, some accessories or parts need to be transferred from the defective product to the replacement product.
note:
Before you send your defective printer to HP, make sure you remove the correct accessories to use with your new printer.
-
Turn on the printer.
-
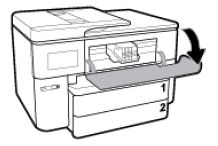
Open the ink cartridge access door.The carriage moves to the center of the printer.
-
Wait until the carriage is idle and silent before you continue.
-
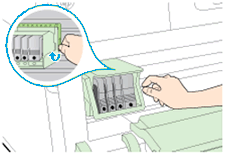
Lift the latch handle on the carriage.
-
Grasp the sides of the printhead, and then lift the printhead and pull it toward you to remove it.
note:
Do not remove the ink cartridges from the printhead. You can remove the printhead with all of the ink cartridges installed.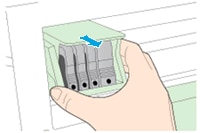
-
Recycle the printhead assembly and ink cartridges.
note:
Do not use the old ink cartridges or printhead in your replacement printer. The replacement printer ships with an installed printhead and new Setup ink cartridges. -
Turn off the printer.
-
Disconnect the power cord from the rear of the printer, and then unplug the power cord from the wall outlet, surge protector, extension cable, or power strip.
-
Disconnect any cables connected to the printer.
-
Keep the following accessories to use with the replacement printer:
-
Power cord

-
Phone cord

-
Ethernet cable

-
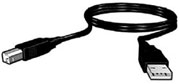
Universal Serial Bus (USB) cable
-
Printer manuals
-
-
Printer software CDs

-
Connect the power cord to the rear of the replacement printer, and then plug it into a wall outlet.
-
Turn on the replacement printer, install the Setup ink cartridges, and then test all printer functions.
For additional printer support information, go to HP Customer Support.
Enter a topic to search our knowledge library
What can we help you with?

Need Help?