solution Contentsolution Content

HP Deskjet 3510 and Deskjet Ink Advantage 3510 e-All-in-One Printer Series - Setting up the e-All-in-One (Hardware)

This document explains how to set up the physical parts of the printer.
This document includes the following steps to set up the printer:
  • Check the contents of the box.
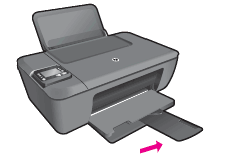
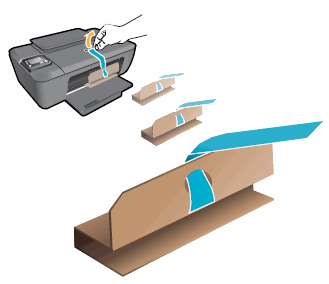
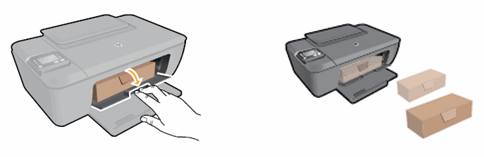
  • Unpack the printer.
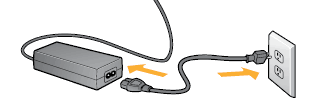
  • Connect the power cord and the power supply.
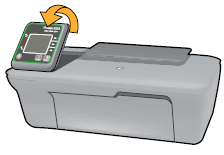
  • Adjust the control panel display.
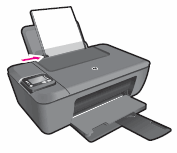
  • Turn on the power.
  • Select the language and location.
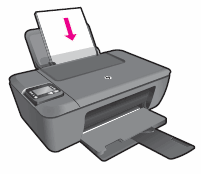
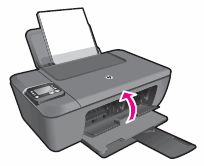
  • Load paper.
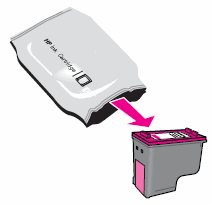
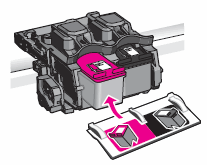
  • Install the cartridges.
  • Align the cartridges.

Setting up the e-All-in-One

Follow these steps in order.

Step one: Check the contents of the box

The contents might vary by country/region. See the packaging for a list of items shipped in the box.

Step two: Unpack the printer

  1. Remove all the tape from the outside of the printer.
  2. Open the front access door, and then remove the tape and cardboard from inside the printer.
    Figure : Remove the tape and cardboard from inside the printer
    Image: Remove the tape and cardboard from inside the printer
  3. Open the cartridge access door, and then remove the cardboard box from inside the printer.
    Figure : Remove the cardboard box from inside the printer
    Image: Remove the cardboard box from inside the printer
  4. Close the cartridge access door.
  5. Remove the contents from the cardboard box.
    Figure : Remove the contents from the cardboard box
    Image: Remove the contents from the cardboard box.

Step three: Connect the power cord and the power supply

  1. Insert the power cord into the back of the printer.
    Figure : Insert the power cord into the back of the printer
    Image: Insert the power cord into the back of the printer
  2. Connect the power cord to the power supply, and then into a power outlet.
    Figure : Connect the power cord to the power supply, and then into a power outlet
    Graphic: Connect the power cord to the power supply, and then into a power outlet

Step four: Lift the control panel display

Lift the control panel display.
Figure : Lift the control panel display
Graphic: Lift the control panel display

Step five: Turn on the power

Press the Power button () to turn the printer on.

Step six: Select the language and region

When you first turn on the printer, the control panel prompts you to select the language and the region. Use the following steps to set the default language and country/region for your printer.
  1. Press the Down Arrow () to highlight your preferred language, and then press OK.
  2. Press the Down Arrow ( ) to select Yes, and then press OK. The Set Country/Region menu opens.
  3. Press the Down Arrow () to highlight your region, and then press OK.
  4. Press the Down Arrow () to select Yes, and then press OK.
  5. When prompted to install the software, press OK.
    • The software installation might include steps with basic video demonstrations to set up the printer hardware. You can follow those steps or refer to this document again for more detailed instructions.
    • If you want to complete the hardware set up before you install the software, continue to the next step to load paper.

Step seven: Load paper

  1. Raise the input tray.
    Figure : Raise the input tray
    Image: Raise the input tray
  2. Lower the output tray.
    Figure : Lower the output tray
    Image: Lower the output tray
  3. Pull out the tray extender.
    Figure : Pull out the tray extender
    Image: Pull out the tray extender
  4. Load plain white paper into the input tray with the short edge forward and the print side up.
    Figure : Load the paper into the input tray
    Image: Load plain, white paper into the input tray
  5. Slide the paper width guide inward until it rests against the edge of the paper.
    Figure : Slide the paper width guide inward
    Image: Slide the paper width guide inward

Step eight: Install the cartridges

  1. Open the cartridge access door. The carriage moves to the center of the printer. Wait until the carriage is idle and silent before you continue.
    Figure : Open the cartridge access door
    Image: Open the cartridge access door
  2. Remove the cartridge from its packaging.
    Figure : Remove the cartridge from its packaging
    Image: Remove the cartridge from its packaging
  3. Carefully pull the pink pull tab on the cartridge to remove the plastic tape.
      caution:
    Do not touch the copper-colored contacts or ink nozzles. Also, do not re-tape the cartridges. Doing so can result in clogs, ink failure, and bad electrical connections.
    Figure : Remove the plastic tape
    Image: Removing the plastic tape
  4. Hold the cartridge by its sides with the nozzles toward the printer, and then insert the cartridge into its slot until it clicks into place.
    • Insert the tri-color cartridge in the slot on the left.
    • Insert the black cartridge in the slot on the right.
    Figure : Insert the cartridge into its slot
    Image: Inserting the cartridge into its slot
  5. Repeat these steps to insert the other cartridge.
  6. Close the cartridge access door.
    Figure : Close the cartridge access door
    Image: Closing the cartridge access door
    The printer automatically prints a cartridge alignment page.

Step nine: Align the cartridges

  1. Lift the scanner lid.
  2. Place the alignment page print side down on the right front corner of the scanner glass. See the engraved guide on the printer for help loading the alignment page.
    Figure : Place the alignment page on the scanner glass
    Image: Place the alignment page on the scanner glass
  3. Close the scanner lid.
  4. Press OK. The printer automatically aligns the cartridges.