This document describes the process for using the Driver Deployment Utility (DDU) and HP Universal Print Driver (UPD) to create a pre-install driver for deployment.
HP UPD Compatible LaserJet Printers - Using the Driver Deployment Utility (DDU) with HP Universal Print Driver (UPD) to Pre-Install a Driver for USB Connectivity
Information
Details
-
Acquire the DDU from the HP Driver Deployment Utility Software page. Click here to view the "HP Driver Deployment Utility Software" page (http://www.hp.com/go/ddu).
-
Download the latest available version of the UPD from the HP Universal Print Driver Series for Windows - overview and features page. Click here to view the "HP Universal Print Driver Series for Windows - overview and features" page (http://www.hp.com/go/upd).
-
Extract both the DDU and UPD to the necessary folder. If the installer for UPD launches, simply cancel out of the process.
-
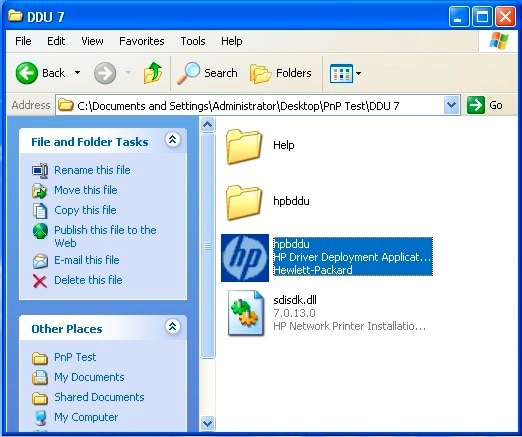
When the DDU is extracted, open the HPBDDU folder, and launch the hpbddu executable.
-
In the DDU interface, click the Select Driver button at the top of the window.

-
Using the Select Driver dialog, navigate to the folder containing the inf files for UPD. Highlight the first file, and click Open. (In this example, it is hpcu083c for UPD 4.7.)

-
The DDU will show that multiple drivers were found. This is because UPD 4.7.x can be installed with two different naming conventions. Both options install the same driver. The simplest way is to select the HP Universal Printing PCL 6 (v4.7) option.

-
Review the other options in the DDU, and configure it appropriately. For a true pre-install to take effect without user interaction, make sure that the box next to Show a prompt to connect the printer remains unchecked. If the default printing options need to be changed, select the Pre-configure this driver box.

-
Click the Save As button under Package Target. This will open a standard Save As dialog. Choose a name for the package, and click Save.

-
This will return you to the DDU window. Click Create Package to generate the deployment package. The DDU will then repackage the driver with all the requested settings in the DDU.

-
If the Pre-configure this driver option is selected, a dialog box with the various configuration options will appear. Select the required options, and click OK.

-
When the creation is complete, the DDU will display the success message. You can use this dialog to open the directory where you saved the package.

-
Click Open Package Directory. The directory will contain three files. A cab file, an executable, and an XML file, all with the name assigned in the DDU.

-
The executable needs administrator privileges to install the driver. An administrator can either log on to the PC to run the executable, or the executable can be run using Run As. If you are currently logged in as a standard user, one way to run as administrator is to right-click the executable, and select Run as… from the list of options.

-
In the Run As dialog box, select the button next to The following user:, select an administrator account from the list, and enter the password for that account. Click OK.

-
The executable will begin the deployment of the driver with the administrator credentials. The following small dialog will show during part of the process:

- When the deployment is complete, the end user simply needs to plug in the USB cable for the printer, and a plug and play event will occur using UPD to create the new print queue.
Enter a topic to search our knowledge library
What can we help you with?

Need Help?