solution Contentsolution Content

HP LaserJet Enterprise MFP M630 - Setting up the printer (hardware) (f model)

This document explains how to set up the physical parts of the printer. Complete these steps before installing the printer software on the computer.
This document includes the following steps to set up the printer:

Unpack the printer

  1. Select a site to place the printer that meets the following specifications:
    • A sturdy, well-ventilated, dust-free area, away from direct sunlight
    • Temperature range: 15° - 30° C
    • Humidity range: 10% - 80%
    Allow enough space around the printer to open all doors and trays.
    Figure : Space requirements
  2. Follow the instructions on the box to install the ramps and roll the HP printer out of the box, and then remove the packaging material. Verify that the contents match this illustration.
      caution:
    The printer weighs 73.5 kg. HP recommends that five people move the printer.
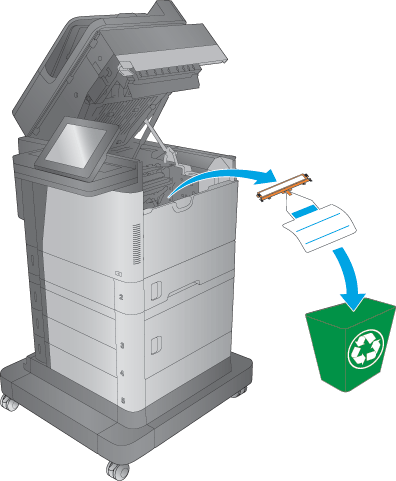
    note:
    HP recommends recycling packing materials whenever possible.
    Figure : Contents of the box
  3. Stabilize and lock the wheels:
    1. Pull out each of the two stabilizers located on the left side, and then rotate clockwise.
    2. On each of the two front wheels, press down on the locking lever.
    Figure : Stabilize and lock wheels
  4. Remove all tape and packing material from the outside of the printer. Open all doors and paper trays, and remove all tape, orange plastic tray inserts, and other packing material from inside the printer.
    Figure : Remove the shipping tape and foam protector

Prepare the toner cartridge

  1. Pull the top cover release lever to open the top cover.
    Figure : Open the top cover
  2. Remove the packing material from inside the printer.
    Figure : Remove packing material
  3. Grasp the handle of the toner cartridge and pull out to remove it.
    Figure : Remove toner cartridge
  4. Hold both ends of the toner cartridge and rock it back and forth 5-6 times to distribute the toner.
    Figure : Rock the toner cartridge
  5. Pull on the orange tab to remove the toner sealing tape. Completely remove the sealing tape from the cartridge.
    Figure : Pull the orange tab to remove toner sealing tape
  6. Remove the discovery sheet.
    Figure : Remove the discovery sheet
  7. Align the toner cartridge with its slot, and then insert the toner cartridge into the printer.
    Figure : Insert toner cartridge
  8. Close the top cover.
    Figure : Close top cover

Attach the output bin

How to Replace the CSR Output Bin Lock on the HP LaserJet Enterprise MFP M631-M636, M637
No audio. Learn how to remove and replace the CSR output bin lock on the HP LaserJet Enterprise MFP M631-M636, M637.
  1. Align the tabs on the output bin with the slots on the left side of the printer.
    Figure : Align the output bin
  2. Rotate the output bin into position.
    Figure : Output bin installed

Connect the network cable (optional)

If the printer is to be connected to a network, connect the network cable now. If not, skip this step and go to the Connect the power cable and turn on the printer section in this document.
  caution:
Do not connect a USB cable now. To use a USB cable to connect the printer to the computer, connect it when prompted during software installation.
Figure : Connect the network cable

Connect the phone cable for fax

To use the fax function, connect the supplied phone cable between the fax port on the printer and a phone jack.
note:
A specific adapter for the RJ11 phone cable might be required to connect to the phone jack.
Figure : Connect the phone cable for fax

Connect the power cable and turn on the printer

Figure : Connect the power and turn on the printer
  1. Connect the power cable to the printer. To prevent damage to the printer, use only the power cable that is provided with the printer.
  2. Connect the power cable to a grounded AC outlet.
      caution:
    Make sure the power source is adequate for the printer voltage rating. The voltage rating is on the printer label. The printer uses either 100-127 Vac or 220-240 Vac and 50/60 Hz.
  3. Turn the printer power on.
    Wait for 60 seconds before continuing. During this time, if the printer is connected to a network, the network recognizes the printer and assigns an IP address or host name for the printer.
  4. On the control panel, set the language, the date/time format, and the time zone. When the Home screen appears, touch Initial Setup, and enable basic printer functions.
    note:
    For advanced setup for network-connected printers, enter the printer IP address in the address bar of a Web browser after software installation is complete.
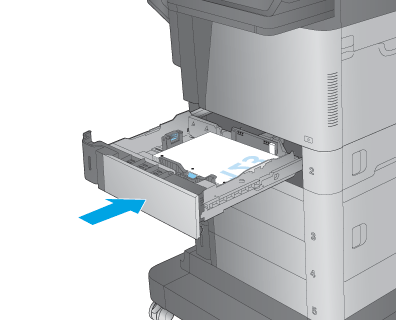
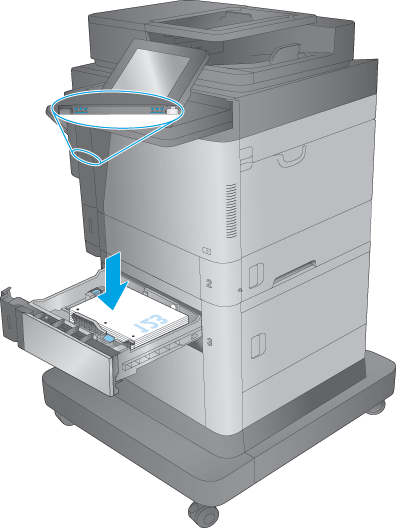
Load Tray 2

How to Load the 500 Sheet Paper Tray on the HP LaserJet Enterprise MFP M630
No audio. Learn how to load the 500-sheet paper tray on the HP LaserJet Enterprise MFP M630.
  1. Open the tray.
    note:
    Do not open this tray while it is in use.
    Figure : Open the tray
  2. Adjust the paper-length and paper-width guides by squeezing the adjustment latches and sliding the guides to the size of the paper being used.
    Figure : Adjust the guides
  3. Load paper into the tray. Check the paper to verify the guides lightly touch the stack, but do not bend it.
    note:
    To prevent jams, do not overfill the tray. Be sure that the top of the stack is below the tray full indicator.
    note:
    If the tray is not adjusted correctly, an error message might appear during printing, or the paper might jam.
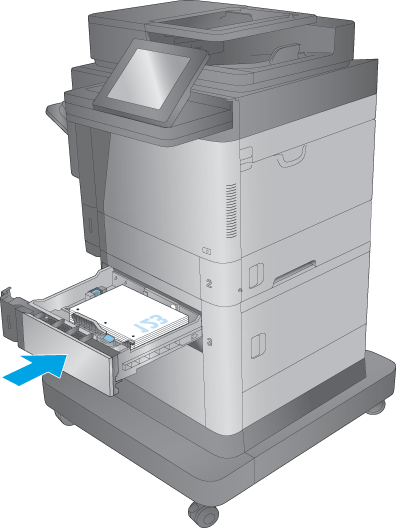
    Figure : Load paper
    Figure : Adjust the guides
  4. Close the tray.
    Figure : Close the tray
  5. The tray configuration message displays on the printer control panel.
  6. Touch the OK button to accept the detected type and size, or touch the Modify button to choose a different paper size or type.
  7. Select the correct type and size, and then touch the OK button.

Load the 1x500-sheet paper feeder with storage cabinet (Tray 3)

  1. Open the tray.
    note:
    Do not open this tray while it is in use.
    Figure : Open the tray
  2. Adjust the paper-length and paper-width guides by squeezing the adjustment latches and sliding the guides to the size of the paper being used.
    Figure : Adjust the guides
  3. Load paper into the tray. Check the paper to verify that the guides lightly touch the stack, but do not bend it.
    note:
    To prevent jams, do not overfill the tray. Be sure that the top of the stack is below the tray full indicator.
    note:
    If the tray is not adjusted correctly, an error message might appear during printing or the paper might jam.
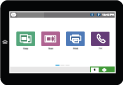
    Figure : Load paper
    Figure : Adjust the tray guides
  4. Close the tray.
    Figure : Close the tray
  5. The tray configuration message displays on the printer control panel.
  6. Touch the OK button to accept the detected type and size, or touch the Modify button to choose a different paper size or type.
  7. Select the correct type and size, and then touch the OK button.

Verify that the printer functions

To verify that the printer functions, follow the steps below.
note:
The steps vary according to the control panel.
FutureSmart 3
FutureSmart 4
FutureSmart 3
  1. To verify that the printer prints, do the following:
    1. From the Home screen on the printer control panel, scroll to and touch the Administration button.
    2. Open the following menus:
      • Reports
      • Configuration/Status Pages
    3. Touch the Configuration Page item to select it.
    4. Touch the Print button to print the configuration and Jetdirect pages.
    5. If the printer is connected to a network, find the IP address on the Jetdirect page.
      • IPv4: If the IP address is 0.0.0.0, or 192.0.0.192, or 169.254.x.x, manually configure the IP address. Otherwise, the network configuration was successful.
      • IPv6: If the IP address begins with "fe80:", the printer should be able to print. If not, manually configure the IP address.
      Figure : Jetdirect page
  2. To test the document feeder and the copy function, do the following:
    1. Place the printed configuration page face-up in the document feeder.
    2. From the Home screen on the printer control panel, touch the Start button. The printer copies, and then prints a page.
  3. To test the scanner glass and the copy function, do the following:
    1. Place the printed configuration page face-down on the scanner glass.
    2. From the Home screen on the printer control panel, touch the Start button. The printer copies, and then prints a page.
FutureSmart 4
  1. To verify that the printer prints, do the following:
    1. From the Home screen on the printer control panel, scroll to and select Reports.
    2. Select Configuration/Status Pages.
    3. Select Configuration Page.
    4. Select Print to print the configuration and Jetdirect pages.
    5. If the printer is connected to a network, find the IP address on the Jetdirect page.
      • IPv4: If the IP address is 0.0.0.0, or 192.0.0.192, or 169.254.x.x, manually configure the IP address. Otherwise, the network configuration was successful.
      • IPv6: If the IP address begins with "fe80:", the printer should be able to print. If not, manually configure the IP address.
      Figure : Jetdirect page
  2. To test the document feeder and the copy function, do the following:
    1. Place the printed configuration page face-up in the document feeder.
    2. From the Home screen on the printer control panel, touch Copy. The printer copies, and then prints a page.
  3. To test the scanner glass and the copy function, do the following:
    1. Place the printed configuration page face-down on the scanner glass.
    2. From the Home screen on the printer control panel, touch Copy. The printer copies, and then prints a page.

Update the firmware (optional but recommended)

HP regularly updates features that are available in the printer firmware. Update the printer firmware to take advantage of the most current features.
note:
Check with the network administrator before updating the firmware.
Click here for information on updating the printer firmware using a USB flash drive or the Embedded Web Server (EWS).

Install the printer software

After completing the previous setup steps, install the printer software.
Windows: Install the printer software from the CD. Follow the on-screen instructions. See the Install Notes file on the printer CD for more specific software installation instructions.
macOS: Mac computers and Apple mobile devices are supported with this printer. The Mac print driver and print utility are available for download from hp.com and might also be available via Apple Software Update. The HP Mac software is not included in the in-box CD. The steps to download the Mac installer software are as follows: Go to www.hp.com/support/ljMFPM630. Select Support Options, and then under Download Options select Drivers, Software & Firmware. Click the operating system version, and then click the Download button.
  caution:
Do not connect a USB cable now. To use a USB cable to connect the printer to the computer, connect it during the software installation.
note:
The default driver for macOS 10.8 Mountain Lion and macOS 10.9 Mavericks is the Apple AirPrint driver. To install the full featured HP driver, when adding a printer, from the drop-down list of printers select the appropriate HP driver depending on the model: HP LaserJet MFP M630 or HP LaserJet Flow MFP M630.
For fax and network scan setup instructions, see the User Guide on the product CD.
Setup is complete. If you did not register your printer during software installation, go to www.register.hp.com to register now.

Find more information

For more information, see the User Guide on the printer CD and visit the support Web site for this printer. Touch the Help button on the printer control panel to access Help topics.
FutureSmart 3
FutureSmart 4