If you installed a third-party firewall on your Mac, it could be the cause of scan communication issues. The firewall that comes with macOS and OS X does not impact scan communications.
Confirm the following port information is correct in your third-party firewall. For steps to check ports, consult the support documentation for your particular firewall software.
-
SOAP-based scan: port TCP (8289, 8989)
-
LEDM-based scan: port TCP 8080
-
ORBLite-based scan: port TCP 9500
-
HDT-based scan: ports TCP (9290, 8290) and for PML/SNMP TCP (161, 162) AirScan (uscan) - port TCP 8080 Secure AirScan (uscans) - port TCP 443 IPP (AirScan Scanner uses IPP as well) - port TCP 631
-
Bonjour Discovery: ports UDP (5350, 5351, 5353)
Try to scan. If the error persists, continue to the next step.
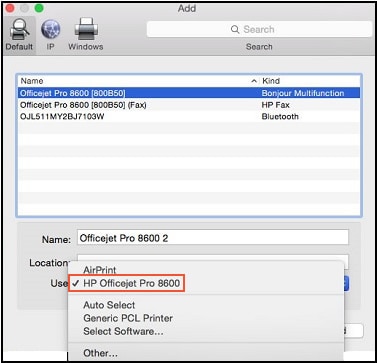
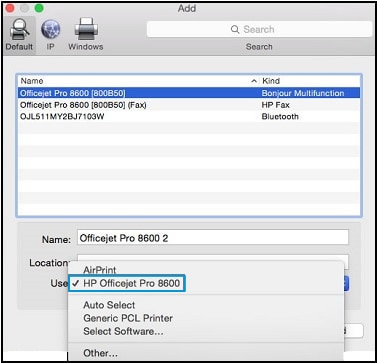
 , click
 , then delete the printer. Once the printer is removed, click the plus sign
  , click