solution Contentsolution Content

HP OfficeJet Pro 7730, 7740 Printers - Replacing Ink Cartridges

This document is for the HP OfficeJet Pro 7730, 7740 Wide Format All-in-One printers.
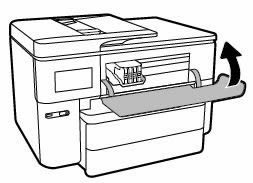
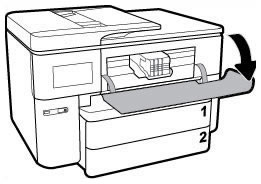
This document contains steps for replacing the ink cartridges.
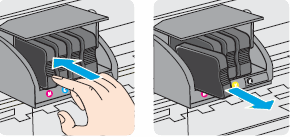
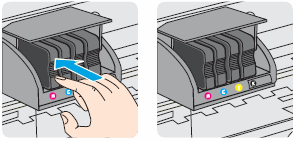
Replace the ink cartridges

Replace any low or empty ink cartridges.
  1. Turn on the printer.
  2. Open the ink cartridge access door.
    Figure : Opening the ink cartridge access door
    Image: Open the ink cartridge access door
  3. Wait until the carriage is idle and silent before you continue.
  4. Push in on the front of the ink cartridge to release it, and then pull the ink cartridge toward you to remove it.
    Figure : Removing the ink cartridge from its slot
    Image: Remove the ink cartridge from its slot.
  5. Remove the replacement ink cartridge from its package.
  6. Slide the new ink cartridge into its slot, and then gently push it forward until it snaps into place.
      caution:
    Do not lift the latch handle on the carriage to insert ink cartridges. Doing so could cause the printhead or ink cartridges to be incorrectly seated, which could damage the print mechanism and cause printing problems.
    Figure : Inserting the ink cartridge into its slot
    Image: Insert the ink cartridge into its color-coded slot
  7. Repeat these steps to install any other new ink cartridges.
  8. Make sure no ink cartridge is sticking out farther than the others. If an ink cartridge is sticking out, push it until it snaps into place.
  9. Close the ink cartridge access door.
    Figure : Closing the ink cartridge access door.
    Image: Closing the ink cartridge access door.

Frequently asked questions (FAQs)

Review the list of frequently asked questions about replacing the ink cartridges.