solution Contentsolution Content

HP OfficeJet 250 Mobile Printers - First Time Printer Setup

This document is for HP OfficeJet 250, 250c, 252, 252c, and 258 Mobile All-in-One printers.
To set up a printer for the first time, remove the printer and all packing materials from the box, install the battery, connect the power cable, set control panel preferences, load paper, and then install the ink cartridges. After your printer is set up, download and install the latest print driver.
note:
If you are looking for the printer software, go to 123.hp.com/oj250 to download the print driver.

Video of setting up the printer

The following video demonstrates how to set up the physical parts of the printer.
Unboxing, Setting Up, and Installing the HP OfficeJet 250 Mobile All-in-One Printer
Learn how to unbox, set up, and install the HP OfficeJet 250 Mobile All-in-One Printer.

Step 1: Remove the printer from the box

The contents might vary by country/region. See the packaging for a list of items shipped in the box.
Remove the printer from the box and all tape, stickers, remove all packing materials from the printer, and then install the battery.
  1. Remove the printer from the box.
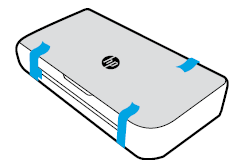
  2. Remove all tape and packing materials from the outside of the printer.
    Figure : Removing tape and packing materials
    Image: Removing tape and packing materials
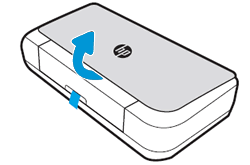
  3. Lift the top cover, remove tape, and then remove the film from the printer control panel.
    Figure : Lifting the top cover and removing tape
    Image: Lifting the top cover and removing tape
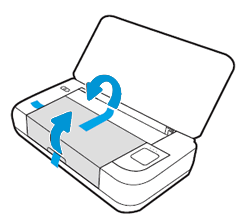
  4. Open the ink cartridge access door, and then remove all tape.
    Figure : Opening the ink cartridge door
    Image: Opening the ink cartridge door
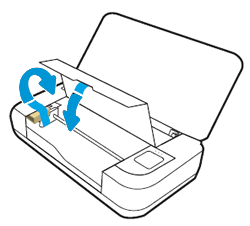
  5. Remove all the tape and packing materials, and then close the ink cartridge door.
    Figure : Removing tape and packing materials
    Image: Removing tape and packing materials
  6. Recycle the packing materials.

Step 2: Insert the battery

Depending on your printer model and the country/region it was sold in, it may have come with an optional lithium-ion rechargeable battery. If your printer did not come with a battery or you purchased one separately, skip to the next step to connect the power cord.
note:
To purchase a battery for your printer, visit the HP Store and search for your printer model.
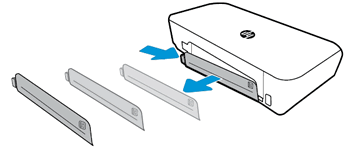
  1. Push the battery cover latch to the right, and then pull the battery cover toward you to remove it.
    Figure : Removing the battery cover
    Image: Removing the battery cover
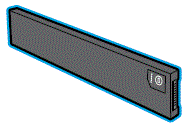
  2. Unwrap the battery.
    Figure : Battery
    Image: Battery
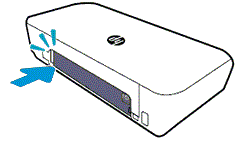
  3. Slide the battery into its slot, and then press the left side of the battery until it clicks into place.
    Figure : Pressing on the edge of the battery
    Image: Pressing on the edge of the battery
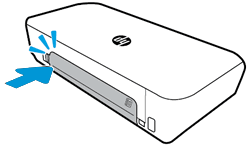
  4. Slide the battery cover into its slot, and then make sure the left side of the cover clicks into place.
    Figure : Installing the battery cover
    Image: Installing the battery cover

Step 3: Connect the power cord and set your preferences

Plug the printer into an electrical outlet, turn on the printer, and then set your preferences.
note:
Do not connect a USB cable at this time. The connection to the computer is established during software installation.
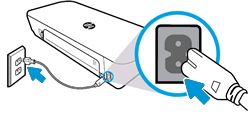
  1. Connect the power cord to the rear of the printer, then plug the other end of the power cord into an electrical outlet.
    Figure : Connecting the power cord
    Image: Connecting the power cord and power supply
  2. Turn on the printer.
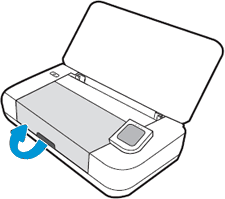
  3. Press the top of the control panel to view the control panel at an angle.
    Figure : Pressing the top of the control panel
    Image: Pressing the top of the control panel to view
  4. On the printer control panel, press the arrow buttons to select your preferred language and country/region, and then press Confirm.

Step 4: Load paper

Load plain U.S. letter, or A4 paper in the input tray.
  1. Open the top cover, and then pull up the input tray extender.
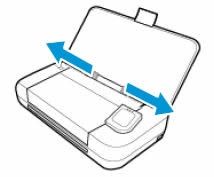
  2. Slide out the paper-width guides as far as possible.
    Figure : Sliding out paper-width guides as far as possible
    Image: Sliding paper-width guides out as far as possible
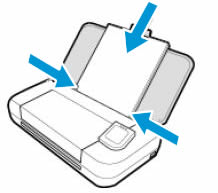
  3. Load 50 sheets of plain paper or less into the paper tray, and then slide in the paper-width guides until they rest against the sides ofthe paper.
    Figure : Sliding in paper-width guides against the paper
    Image: Sliding paper-width guides against the paper

Step 5: Install the ink cartridges

Install the HP ink cartridges that shipped in the box with your printer.
  1. Open the ink cartridge access door.
    Figure : Opening the ink cartridge access door
    Image: Opening the ink cartridge access door
  2. Wait until the carriage is idle and silent before you proceed.
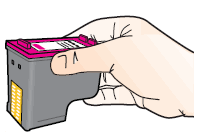
  3. Remove the tape on the ink cartridges. Be careful to only touch the black plastic on the ink cartridge.
    Figure : Removing the ink cartridge from its package
    Image: Removing the ink cartridge from its package
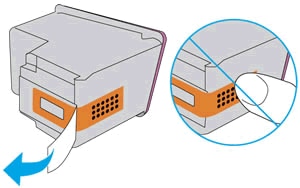
  4. Remove the plastic tape from the ink cartridge.
      caution:
    Do not touch the copper-colored contacts or the ink nozzles.Do not replace the protective tape on the contacts. Handling these parts can result in clogs, ink failure, and bad electricalconnections.
    Figure : Removing the plastic tape
    Image: Removing the plastic tape
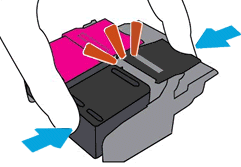
  5. Insert the ink cartridge into its slot, and then press the ink cartridge until it latches into place.
    note:
    Install the color ink cartridge on the left and the black ink cartridge on the right.
    Figure : Closing the ink cartridge latch
    Image: Making sure the ink cartridge is snapped into place
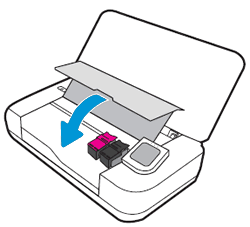
  6. Close the ink cartridge access door.
    Figure : Closing the ink cartridge access door
    Image: Closing the ink cartridge access door
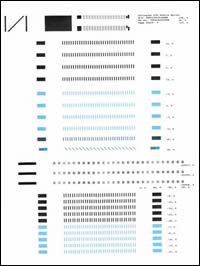
  7. After installing the ink cartridges, the printer automatically prints an alignment page. Aligning the ink cartridges is necessary to achieve the best print quality.
    If the printer did not automatically align the ink cartridges, align the ink cartridges from the printer control panel:
    1. From the home screen on the printer control panel, swipe down to open the Dashboard, and then touch the Setup icon .
    2. Swipe up on the display, touch Printer Maintenance, touch Align Printer, and then touch Continue.
      An alignment page prints.
      Figure : Example of an alignment page
      Image: Example of an alignment page
Your HP printer hardware is now set up and you can install the printing software. Do not attempt to connect the printer to a computer until instructed to do so in the printing software.

Step 6: Install the printer software

Download the latest version of the printing software from 123.hp.com/OJ250.