This document explains how to set up the physical parts of the product. Complete these steps before you install the product software on your computer.
HP LaserJet 1020 and 1022 Printer Series - Setting Up the LaserJet (Hardware)
Introduction
This document includes the following steps to set up the product:
-
Unpack the printer and check the contents
-
Remove the packing tape
-
Install the print cartridge
-
Connect the power cord
-
Turn on the product
-
Load plain paper
Setting up the printer
Follow these steps in order.
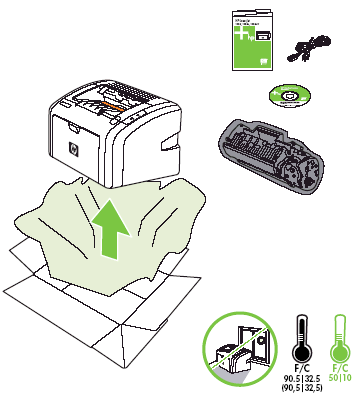
Step one: Unpack the printer and check the contents
-
Remove the product from the box.Figure : Remove the product from the box
-
Check the contents of the box.
The contents might vary by country/region. See the packaging for a list of items shipped in the box.
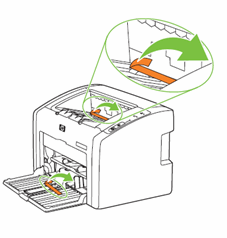
Step two: Remove the packing tape
-
Open the print cartridge access door.Figure : Open the print cartridge access door

-
Remove all the orange packing tape from the product.Figure : Remove the orange packing tape
Step three: Install the print cartridge
-
Open the output tray support, and then open the print cartridge door.Figure : Open the output tray support
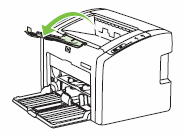 Figure : Open the print cartridge door
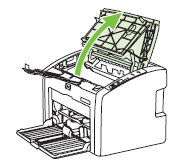
-
Remove the new print cartridge from the package.
caution:
Hold the print cartridge at each end to prevent damage to the print cartridge.Figure : Remove the new print cartridge from the package
-
Gently rock the print cartridge back and forth to distribute the toner evenly.Figure : Rock the print cartridge back and forth

-
Pull the orange tab until all the sealing tape is removed from the print cartridge. Put the tab in the print cartridge box to return for recycling.Figure : Pull the orange tab to remove the sealing tape

-
Insert the print cartridge in the product, and then close the print cartridge door.Figure : Insert the print cartridge

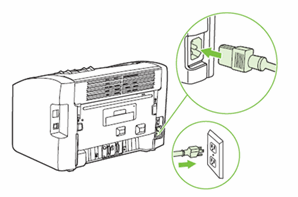
Step four: Connect the power cord
Connect the power cord to the back of the product, and then plug the power cord into an electrical outlet.
Figure : Connect the power cord
Step five: Turn on power
Press the Power switch to turn on the product.
Figure : Press the Power switch

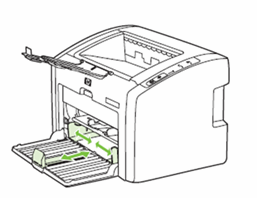
Step six: Load plain paper
-
Slide the paper width and length guides to their outmost positions.Figure : Slide out the paper guides
-
Load the paper into the paper tray, and then slide the paper width and length guides inward until they stop at the edge of the paper.
caution:
Do not use stapled, wrinkled, folded, or damaged paper.Figure : Load the paper and slide in paper guides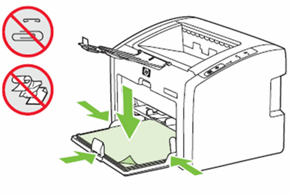
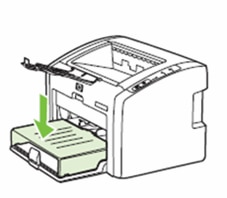
-
Insert the input tray cover over the main input tray.Figure : Insert the input tray cover

-
Close the input tray.Figure : Close the input tray
Enter a topic to search our knowledge library
What can we help you with?

Need Help?