solution Contentsolution Content

HP DeskJet 3630, 4720 Printers - Replacing the Ink Cartridges

This document is for the HP DeskJet 3630, 3631, 3632, 3633, 3634, 3635, 3636, 3637, 3638, 3639, DeskJet Ink Advantage 3635, 3636, 3638, and DeskJet Ink Advantage Ultra 4729 All-in-One Printers.
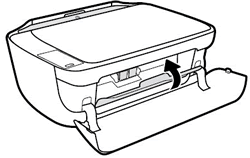
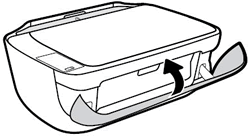
Replace ink cartridges that are low or out of ink with new, genuine HP ink cartridges.

Video overview

This video shows how to replace an ink cartridge on the HP DeskJet 3634 printer.
Replace the ink cartridge | HP DeskJet 3630 printer
If the printer is low or out of toner, follow this video to learn how to replace, change, or install the toner cartridge in the HP DeskJet 3630 All-in-One series printers. Visit https://learn-about-supplies.ext.hp.com/#page-yield to check for compatible ink cartridges and page yields.

Step 1: Replace the ink cartridges

Replace the ink cartridge or ink cartridges indicated by the blinking Ink Level icon .
  1. Press the Power button to turn on the printer, if it is not already on.
  2. Load plain white paper into the input tray.
  3. Open the exterior door.
    Figure : Open the exterior door
    Image: Open the exterior door
  4. Open the ink cartridge access door.
    The carriage moves to the center of the printer.
    Wait until the carriage is idle and silent before you continue.
    Figure : Open the ink cartridge access door
    Image: Open the ink cartridge access door
  5. Lightly press down on the ink cartridge to release it, and then pull the ink cartridge out of its slot.
    Figure : Remove the ink cartridge
    Image: Remove the ink cartridge
  6. Remove the new ink cartridge from its packaging, and then remove the plastic tape.
      caution:
    Do not try to remove the copper electrical strip.
    Do not touch the copper-colored contacts or the ink nozzles.Do not replace the protective tape on the contacts. Handling these parts can result in clogs, ink failure, and bad electricalconnections.
    Figure : Remove the plastic tape
    Image: Remove the plastic tape and do not touch the contacts or ink nozzles
  7. Hold the ink cartridge by its sides with the nozzles toward the printer, and then insert the ink cartridge into its slot. Make sure that the ink cartridge is inserted in the correct slot.
    • The tri-color ink cartridge (
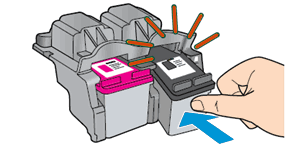
) goes in the slot on the left.
    • The black ink cartridge () goes in the slot on the right.
  8. Push the ink cartridge forward into its slot until it snaps into place.
    Figure : Snap the ink cartridge into place
    Image: Snap the ink cartridge into place
  9. Repeat these steps to replace the other ink cartridge, if necessary.
  10. Close the ink cartridge access door.
    Figure : Close the ink cartridge access door
    Image: Close the ink cartridge access door
  11. Close the exterior door.
    Figure : Close the exterior door
    Image: Close the exterior door
  12. Follow any prompts on the computer screen.
  13. Wait about 30 seconds for the alignment page to automatically print.
    note:
    The printer prints an alignment page automatically only when a new ink cartridge has been installed.

Step 2: Align the ink cartridges

Scanning the alignment page allows the printer to align the ink cartridges and provide the best print quality.
  1. Lift the scanner lid.
  2. Place the alignment page with the print side down on the right-front corner of the scanner glass. See the engraved guide next to the scanner glass for help loading the alignment page.
    Image: Place the alignment page on the scanner glass
  3. Close the scanner lid.
  4. Press the Start Copy Black button or the Start Copy Color button on the printer control panel.
    The printer aligns the ink cartridges.
    note:
    If the alignment page fails to automatically print, you can manually print an alignment page using the HP Printer Assistant software (Windows) or the Printer Utility (macOS or OS X).

Frequently asked questions (FAQs)

Review the list of frequently asked questions regarding replacing ink cartridges.